14+ Fun Ways To Use Old Wine Bottles In The Garden
Using old wine bottles in your landscape is a clever way to add charm and creativity to your garden.
These bottles can be repurposed into stylish decorations and also serve practical functions like irrigation and plant markers.
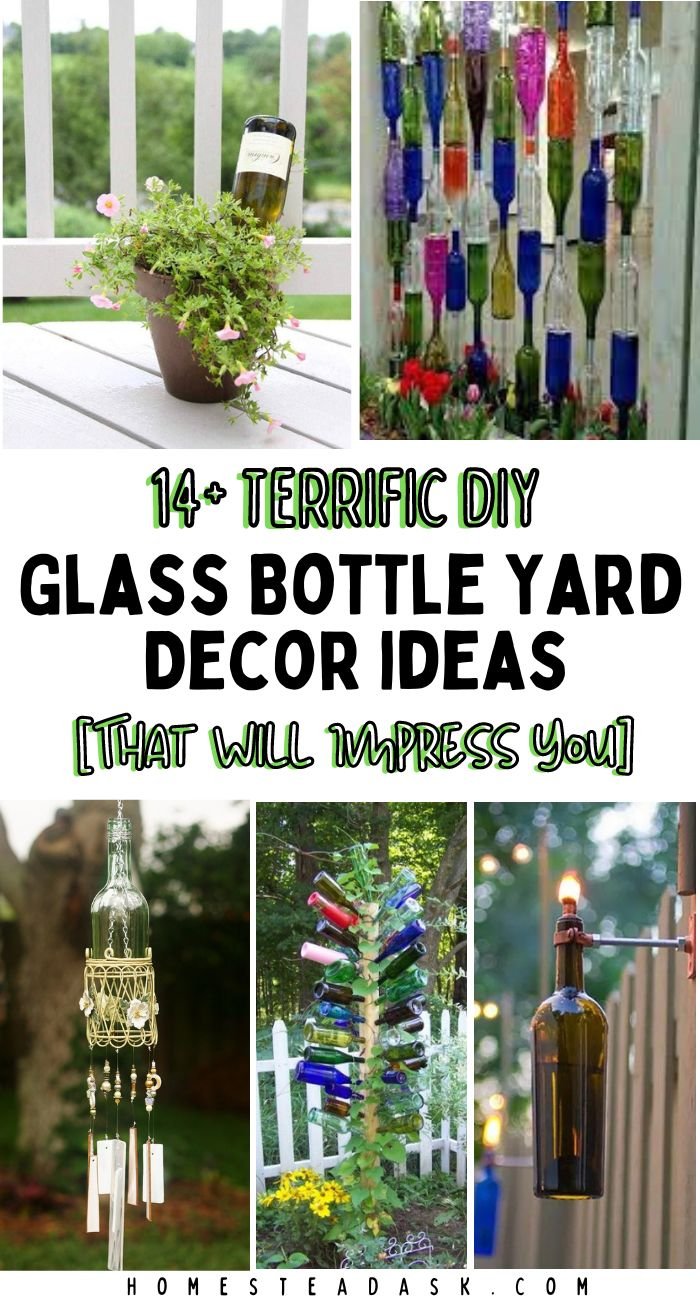
Imagine transforming empty wine bottles into beautiful candle holders or unique garden labels that reflect your personality and style.
You can craft an eye-catching bottle wall or use them as planters for small herbs and flowers.
These projects not only enhance your outdoor space but also help you practice sustainability by reducing waste.
With a little creativity, those bottles can become a focal point that impresses your guests and allows you to express your gardening passion.
Choose a few ideas from this article to get started on making your landscape truly yours.
Whether you’re looking for DIY projects or functional uses, old wine bottles can inspire you to garden like never before.
1. Decorative Garden Art
Using old wine bottles in your landscape can add a unique touch to your garden.
They make great decorative pieces that can enhance your outdoor space.
Here are a few fun ideas:
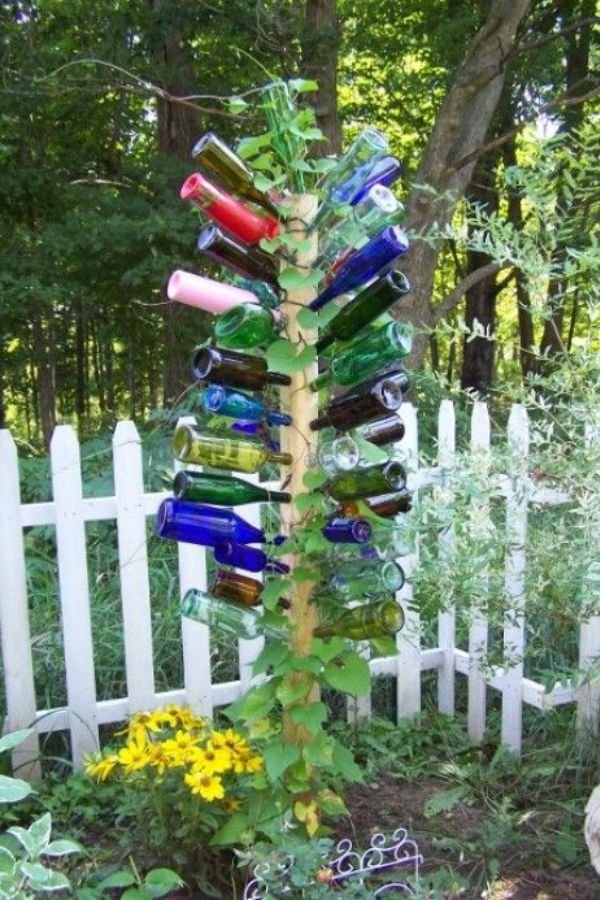
- Bottle Trees: Create a colorful bottle tree by placing bottles on branches. This adds height and whimsy to your garden.
- Garden Sculptures: Arrange bottles in creative shapes such as flowers or animals. Fill them with colorful sand or stones to make them stand out.
- Candle Holders: Transform wine bottles into candle holders. Cut the bottles, paint them, or leave them as is. Add candles for a warm glow during evenings.
- Peacock Art: An artistic peacock made from colored wine bottles can be a stunning focal point. Use a metal frame for support, and attach the bottles to form the peacock’s body and tail.
- DIY Planters: You can cut wine bottles in half and use them as planters. They’re excellent for small succulents or herbs.
These ideas not only recycle bottles but also let your creativity shine.
Each piece you create will tell a story and offer personality to your garden space.
You’ll enjoy the charm they bring to your outdoor area.
2. Functional Garden Structures
Using old wine bottles can add unique charm and usefulness to your garden. Here are some ideas:
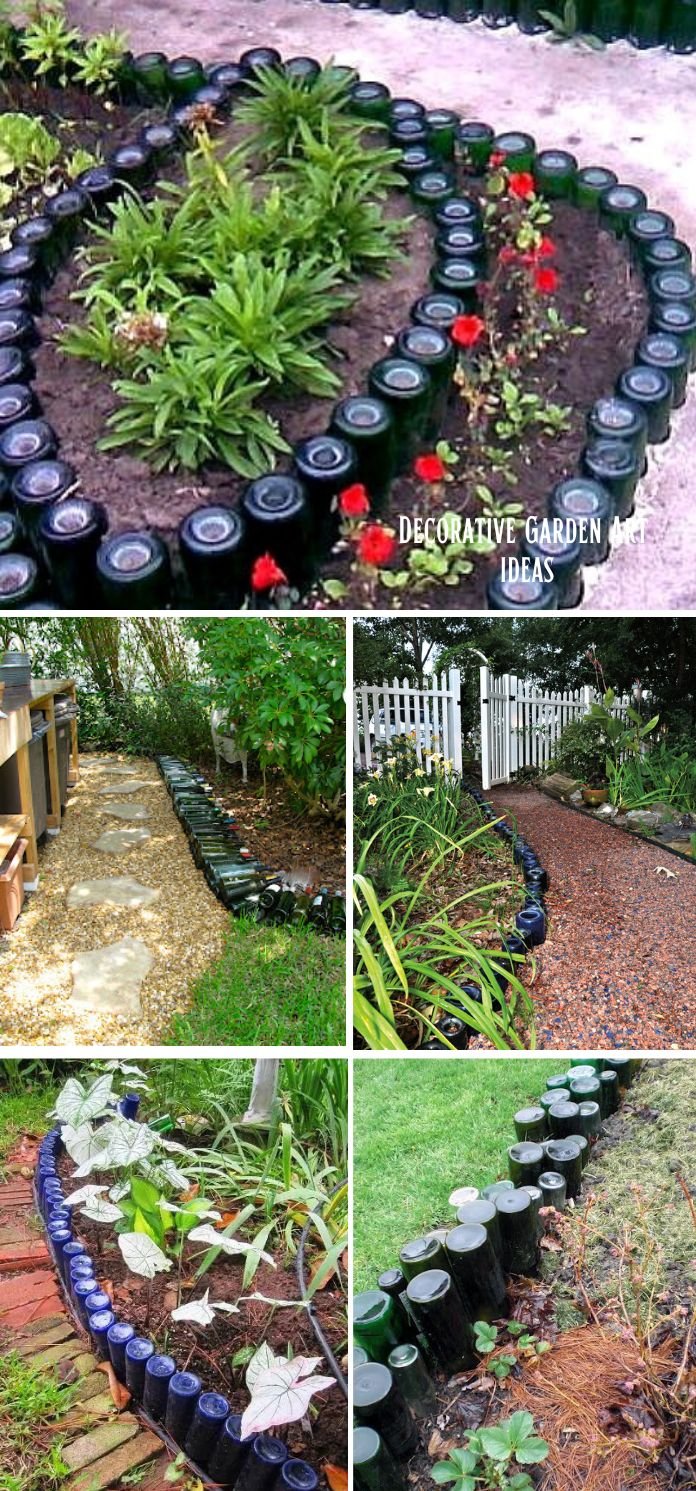
- Garden Edging: Create borders for flower beds or pathways by burying wine bottles neck down. This keeps soil in place while adding color.
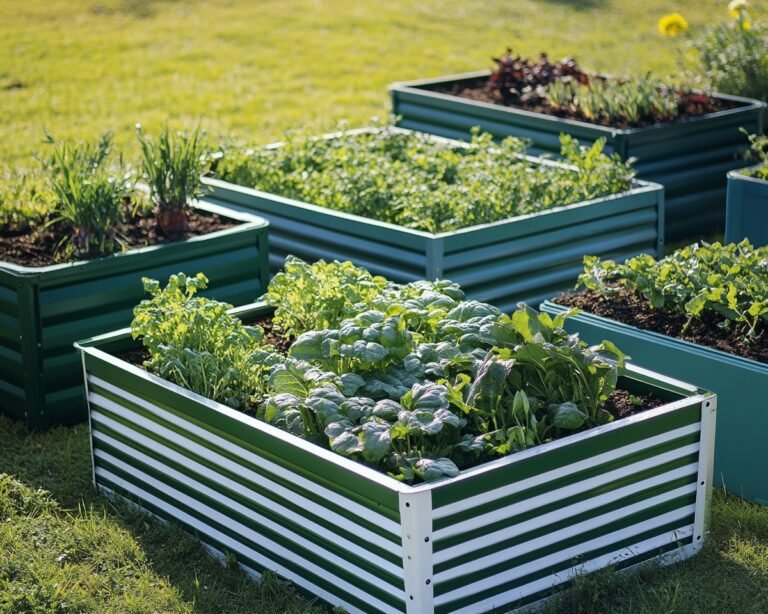
- Raised Beds: Build a raised garden bed with a wooden frame and place wine bottles as a supporting wall. The bottles can retain heat and moisture, helping your plants thrive.
- Pest Barriers: Arrange bottles in a semicircle around plants to deter pests. The bottles reflect light, making it less inviting for unwanted critters.
- Plant Supports: Use sturdy bottles as supports for climbing plants. You can plant vines around them, giving your garden vertical interest.
- Water Features: Create a simple fountain by connecting several bottles. This can add a soothing sound and attract wildlife.
Decorate your garden with creativity and repurpose those bottles into structures that not only look great but serve a purpose too.
With a little effort, you’ll find that these functional structures enhance your outdoor space beautifully.
3. Tiki Torches: Lighting Up The Night
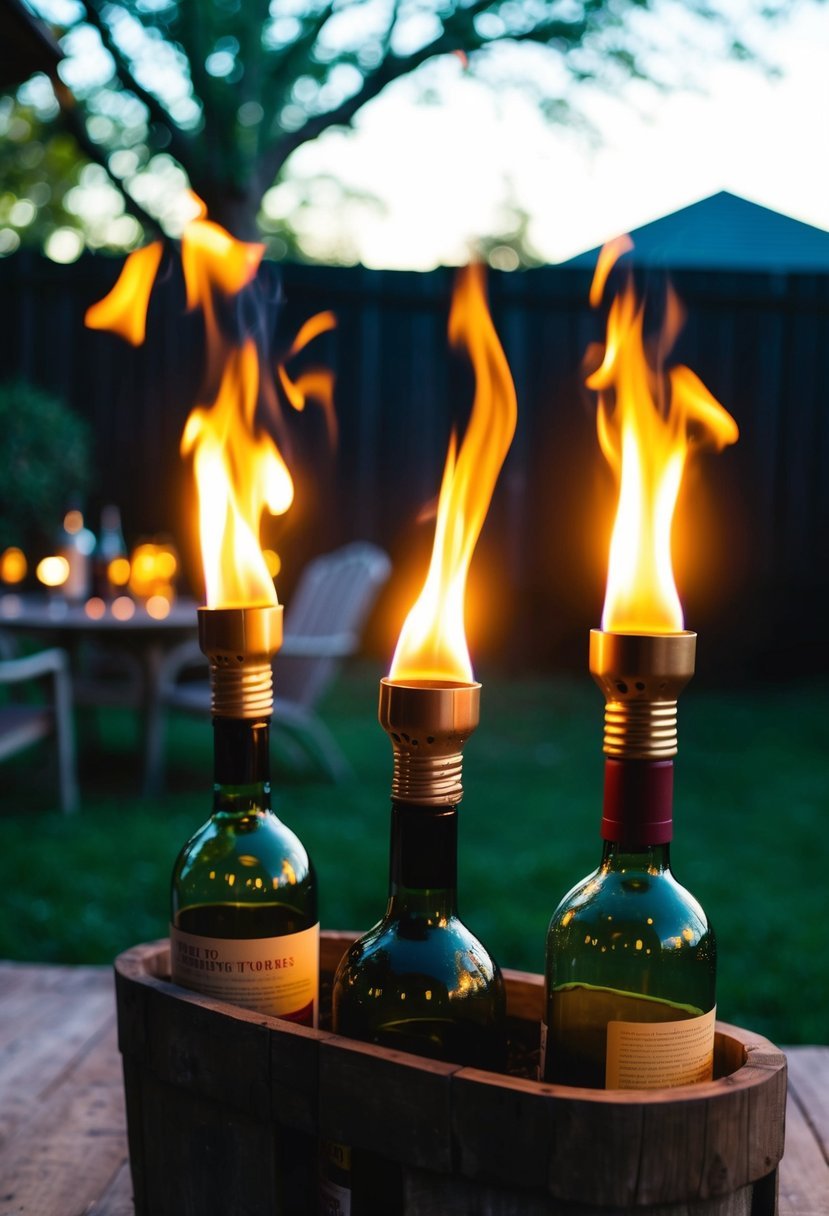
Using old wine bottles to create tiki torches adds charm and warmth to your garden or patio. It’s a fun DIY project that makes your landscape come alive in the evening.
Materials Needed:
- Empty wine bottles
- Tiki torch wick
- Wick holder (coupling)
- Citronella oil or torch fuel
Steps to Create Your Tiki Torch:
- Prepare the Bottle: Clean out the wine bottle thoroughly.
- Insert Wick Holder: Wrap Teflon tape around the wick holder. Then, insert it snugly into the bottle neck.
- Add the Wick: Feed the wick through the holder, leaving about 1/4 inch exposed.
- Fill with Fuel: Pour citronella oil into the bottle, filling it about three-quarters full.
Safety Tips:
- Keep Away from Flammables: Place your tiki torches well away from anything that can catch fire.
- Trim the Wick: Ensure the wick is trimmed to control the flame size.
These torches not only provide light but also help keep bugs away, thanks to the citronella oil.
You can place them along pathways, around seating areas, or near plants to enhance your outdoor space.
Enjoy the cozy glow as the sun sets!
4. Hummingbird Feeders: Attracting Nature
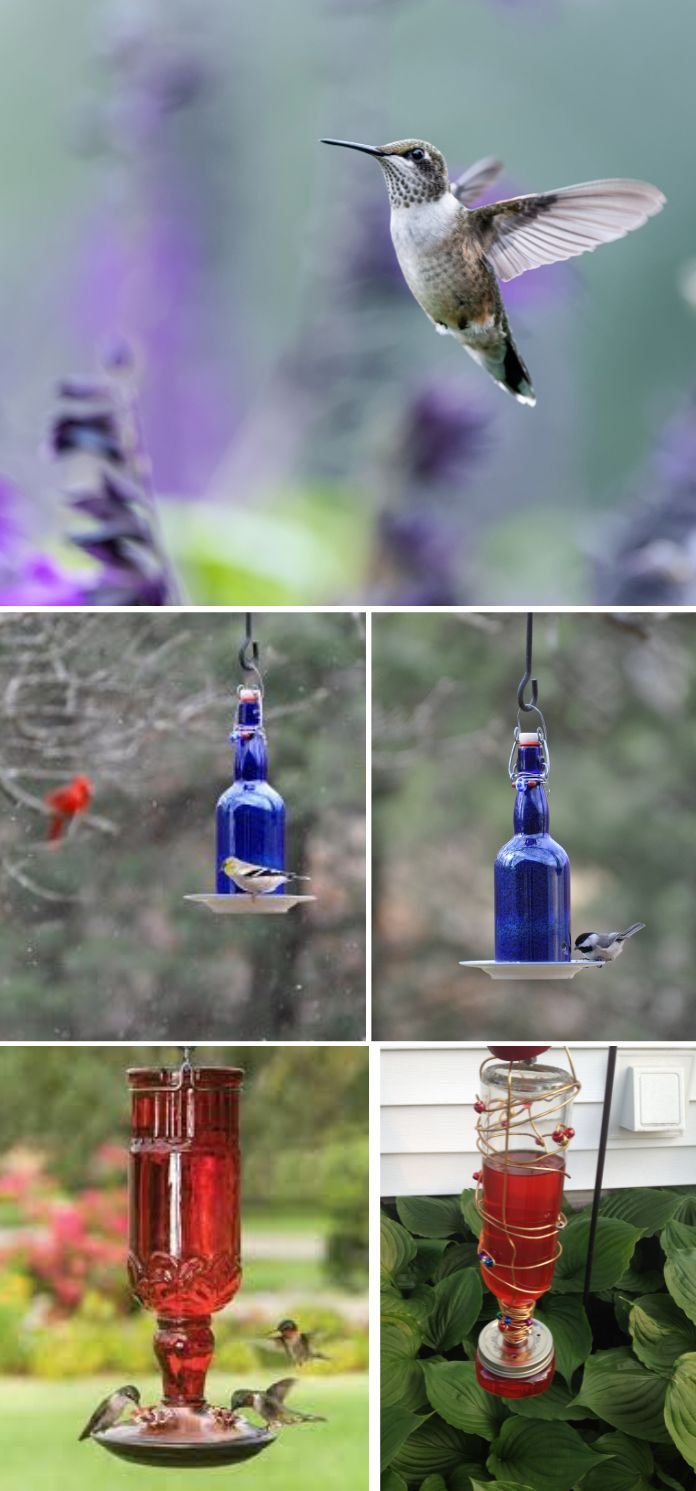
Using old wine bottles as hummingbird feeders can be a fun and engaging way to attract these beautiful creatures to your garden.
To create your own wine bottle feeder, follow these simple steps:
- Select a Bottle: Choose an empty wine bottle. Clean it thoroughly to remove any labels.
- Feeding Tube: You will need a hummingbird feeder tube with a rubber stopper that fits snugly in the neck of the bottle. This will allow the nectar to flow out slowly.
- Copper Wire: Wrap copper wire around the neck of the bottle for hanging. This adds style and makes it easy to hang from trees or hooks.
- Nectar Recipe: Mix four parts water to one part sugar and boil for a few minutes. Let it cool before filling the feeder.
Make your feeder more attractive by adding decorative beads or other embellishments.
Bright colors like red, yellow, or pink will grab hummingbirds’ attention. You can even paint the bottle with glass paint to enhance its look.
By placing your wine bottle feeder in a sunny spot, you will create a welcoming environment.
Regularly clean and refill it to keep the nectar fresh.
Enjoy watching these tiny birds as they visit your garden!
5. Garden Lanterns: Illuminating Spaces
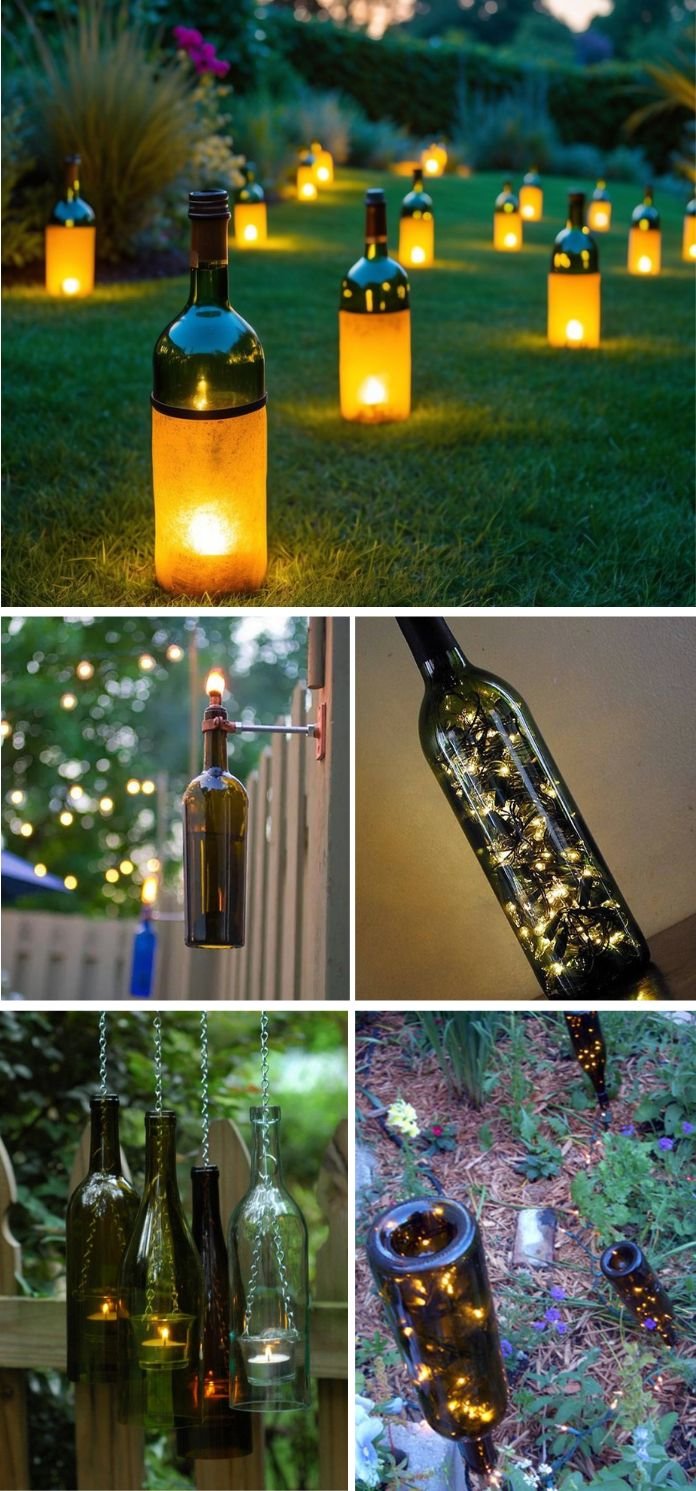
Garden lanterns can transform your outdoor areas into warm and inviting spaces. They add charm while providing practical lighting for evening gatherings.
You can easily create lanterns from old wine bottles. Here’s how:
- Cut the Bottles: Carefully cut the bottom off the wine bottle.
- Add a Light Source: Insert a small LED candle or a string of fairy lights inside.
- Decorate: Paint or wrap the bottles with twine for a personalized touch.
These DIY lanterns not only look lovely but also recycle materials you may already have.
Another fun idea is using mason jars.
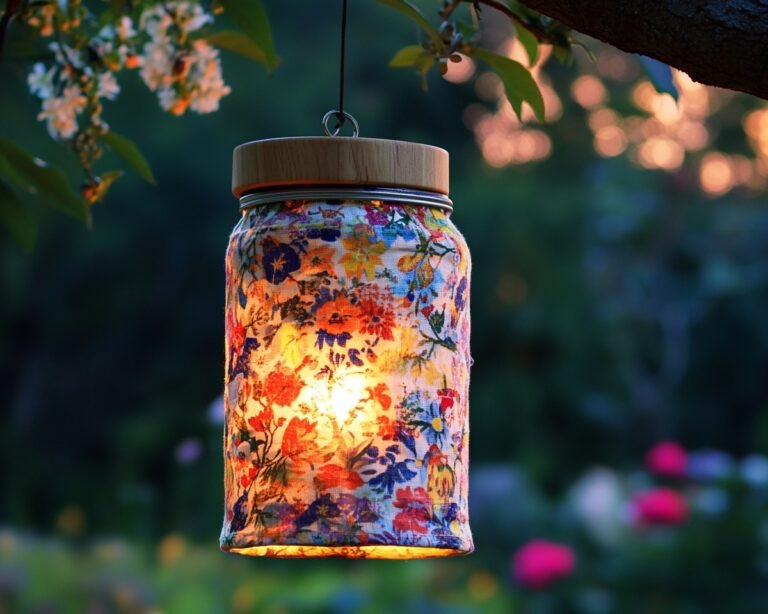
You can turn them into colorful lanterns by adding a beaded handle or using glass frost paint.
This project can be a great activity for kids, making your garden fun and festive.
Consider these options:
- Mason Jar Lanterns: Colorful and easy to make.
- Bottle Lanterns: Bring a rustic vibe using wine bottles.
- Solar Lights: Eco-friendly and charging during the day, perfect for nighttime.
With creativity, your garden can shine beautifully after sunset.
So gather some materials and get started! Enjoy the process, and watch your outdoor space come to life.
6. Wind Chimes: Musical Garden Accents
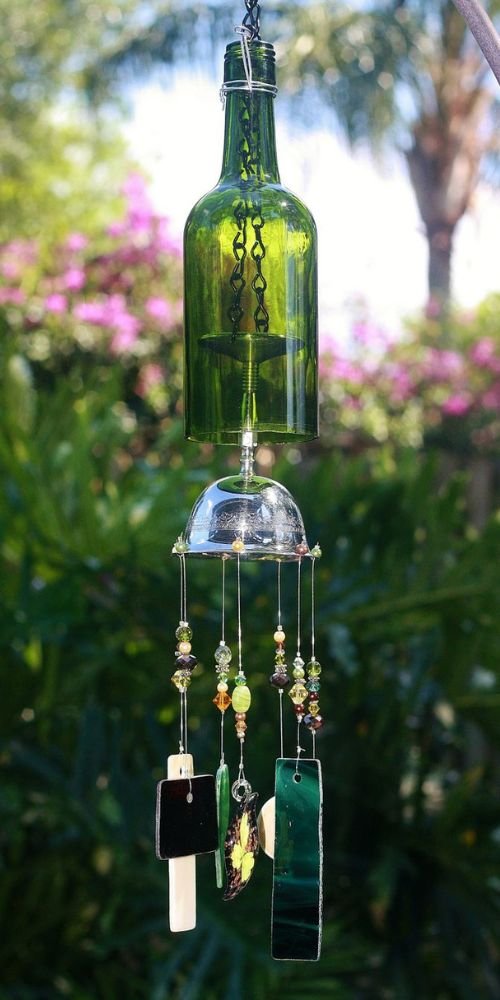
Wind chimes can add a lovely musical touch to your garden. They create soothing sounds that enhance the natural atmosphere. You can make them from various materials, including old wine bottles.
Ideas for DIY Wind Chimes:
- Recycled Pot Chimes: Use a flower pot, beads, and bottle caps. It’s simple and colorful.
- Bottle Cap Chimes: Gather old bottle caps and string them together to create a rustic chime.
- Hummingbird Feeders: Consider adding chimes that double as feeders to attract birds while they sing along.
Using Wine Bottles:
Old wine bottles can turn into unique wind chimes.
- Cut the Bottles: Carefully cut the bottles to create different lengths.
- Drill Holes: Make holes for hanging with strong twine or wire.
- Add Decor: Use beads or shells to decorate and enhance the sound.
Wind chimes not only look beautiful but also serve as great focal points in your garden. They can sway gently in the breeze, reflecting sunlight and creating a magical atmosphere.
Embrace your creativity and enjoy crafting these charming accents for your outdoor space.
7. Edging: Stylish Pathway Borders
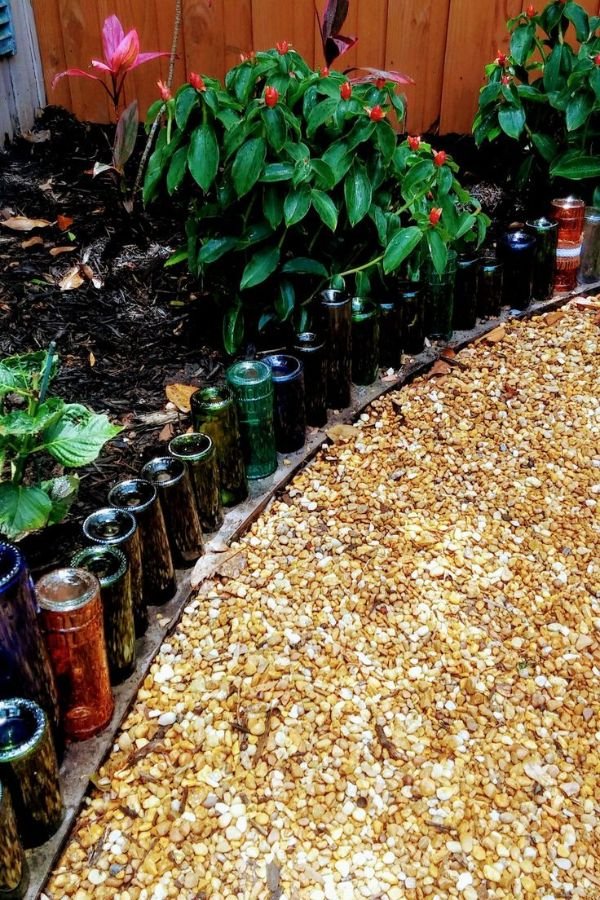
Using old wine bottles as edging creates a charming border for your pathways. This method adds color and character to your garden while reusing materials.
To get started, you’ll need:
- Empty wine bottles (any color works great)
- A shovel
- Soil or gravel for stability
Steps:
- Dig a Trench: Create a trench about half the height of the bottles. This keeps them secure.
- Place the Bottles: Line the bottles up side by side in the trench. Make sure they are upright and evenly spaced.
- Fill with Soil: Add soil or gravel around the bottles for support. Pack it down to keep the bottles from tipping.
This technique works well for defining pathways or garden beds. The bottles not only look attractive, but they can also help prevent erosion.
Plus, you can easily change the look by using different bottle colors. This allows you to match your garden style or seasonal decor.
Another option is to turn the bottles upside down. This creates a unique look and protects your plants by acting as a barrier.
Using old wine bottles as edging is an eco-friendly choice. It’s a simple way to enhance the beauty of your outdoor space. Enjoy the process of creating your own beautiful borders!
8. Vertical Planters: Space-Saving Solutions
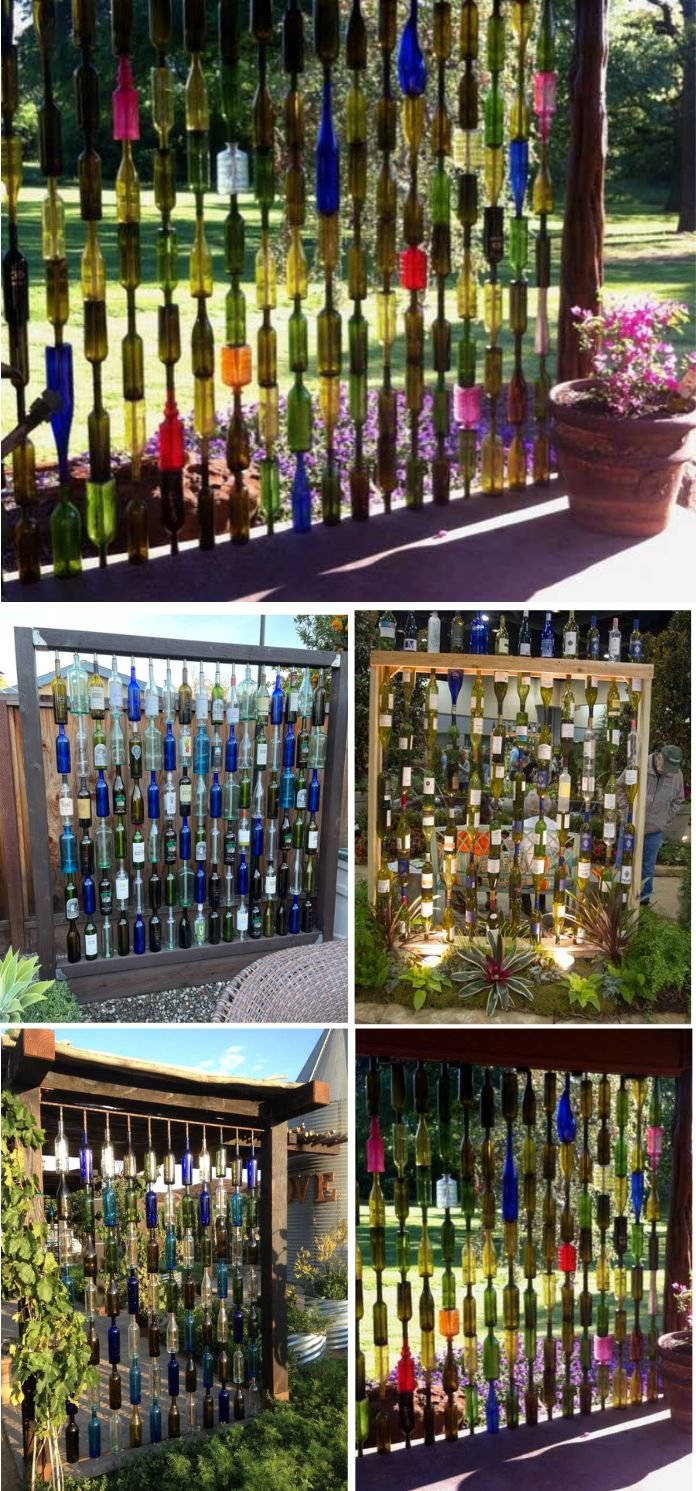
Vertical planters are a great way to maximize your gardening space, especially if you have a small yard or patio. They allow you to grow more plants without taking up valuable ground space.
Consider using wooden pallets. You can easily repurpose them into a vertical garden. Just hang the pallet against a wall and fill it with soil and your favorite plants. This method is eco-friendly and adds a rustic charm.
Another option is a ladder-style planter. These are designed to look like a ladder with planting boxes attached. You can create a charming display using reclaimed wood, giving your space a unique touch. They save space and look appealing.
Hanging planters are also effective. You can use hooks or brackets to suspend pots from your porch or walls. Choose trailing plants to cascade downward, creating a beautiful green curtain.
If you have old wine bottles, consider using them as part of your vertical garden. Create a bottle wall by placing them in a wooden frame. This adds color and recycling to your landscape. It’s a fun project that helps grow herbs or flowers.
Vertical planters not only save space but also create a stunning visual impact. They let you enjoy gardening while making the most of the area you have.
9. Irrigation Systems: Water Conservation Techniques
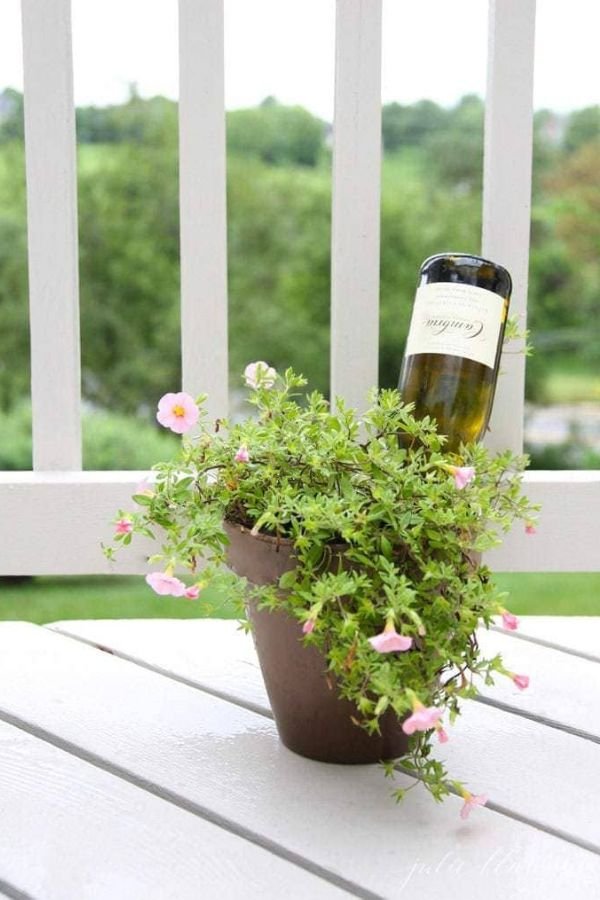
Using old wine bottles in your garden is a smart way to conserve water. This technique helps ensure your plants get a steady supply while reducing waste.
To use wine bottles effectively:
- Prepare the Bottle: Rinse out and fill the bottle with water.
- Insert into Soil: Turn the bottle upside down and place it neck-deep in the soil near the roots of your plants.
This method creates a slow release of water as the soil absorbs it, keeping your plants hydrated.
Another option is to fashion a drip irrigation system from recycled bottles. Here’s how:
- Gather Materials: Use various sizes of plastic bottles from recycling.
- Puncture Holes: Create small holes in the cap using a drill or nail.
- Cut the Bottom: Remove the bottom of the bottles for easy filling.
Insert the bottles into the ground near your plants. The water will drip slowly, providing moisture exactly where it’s needed.
These techniques not only save water but also help you maintain a blooming garden without much effort. Implementing these irrigation systems can make a significant difference in water usage, especially during dry spells.
Embracing these simple methods lets you enjoy your landscaping while being mindful of the environment.
10. Wall Art: Bringing Vertical Design To Life
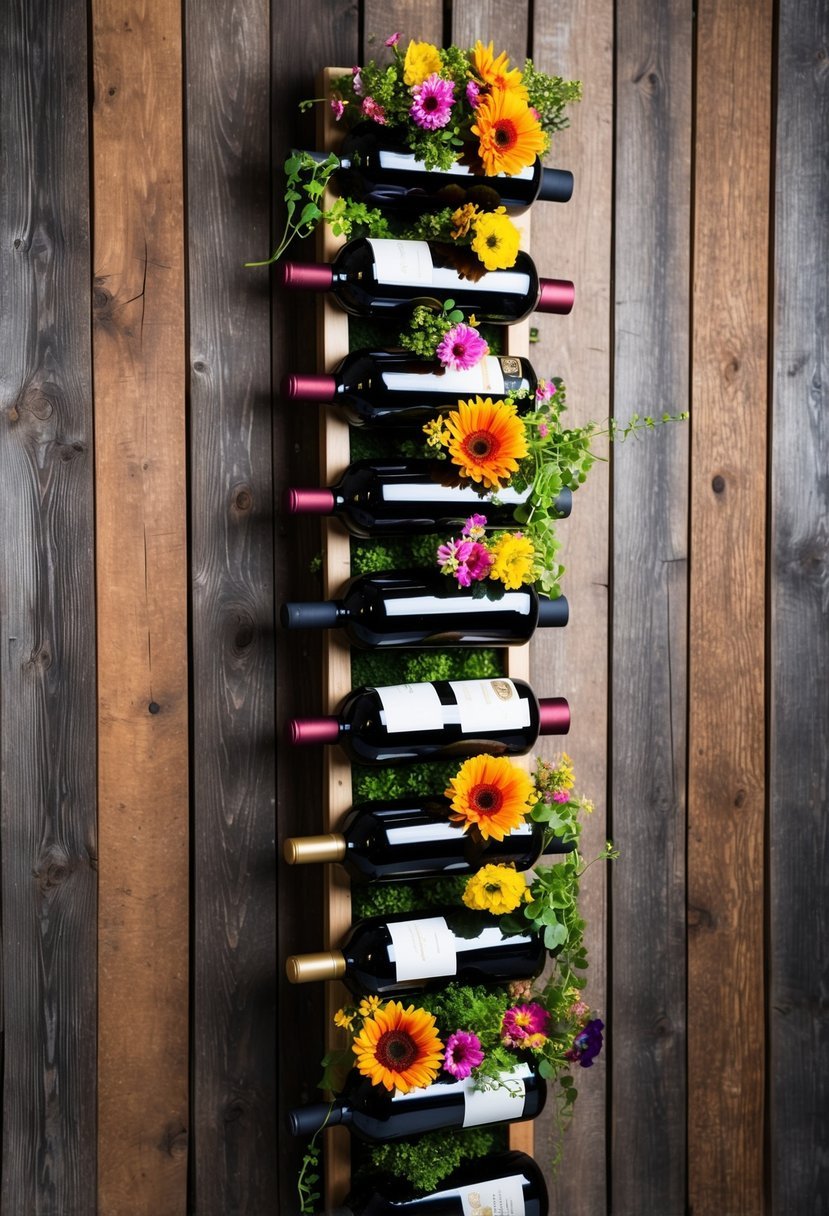
Using old wine bottles for wall art can add a unique touch to your garden or outdoor space. Not only do they look great, but they also recycle materials creatively.
You can create a stunning bottle wall by arranging bottles in a wooden frame.
First, drill holes in the bottom of each bottle. Then, use re-bar rods to secure them in place within the frame. This method allows sunlight to shine through, creating interesting effects.
Another idea is to fill the bottles with colorful stones or lights. This can make your wall art pop, especially at night.
Consider using string lights inside clear bottles for a magical glow.
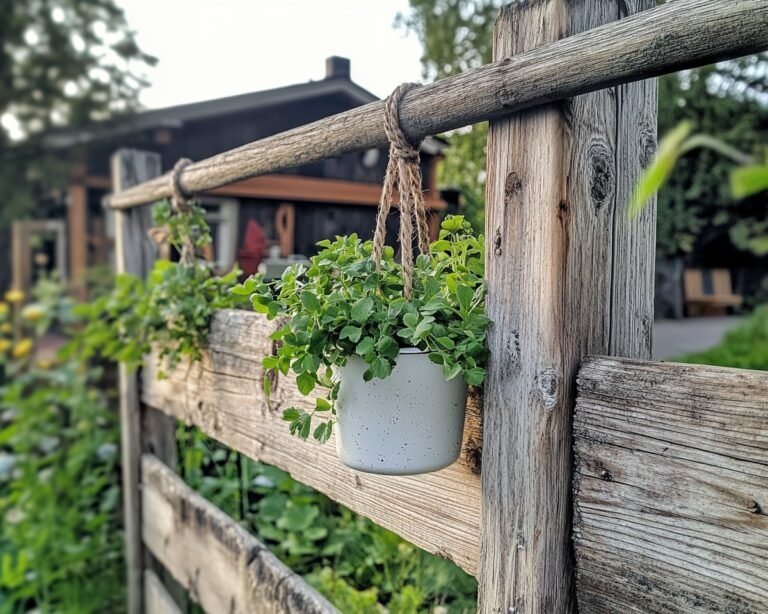
You can also hang bottles directly on a fence or wall. Fill them with soil and plant small succulents or flowers. This brings life to the vertical space while adding greenery.
Tips for creating wall art:
- Choose bottles of similar colors for a cohesive look.
- Consider adding decorative elements like twine or paint.
- Experiment with different arrangements before securing them.
Creating wall art with wine bottles is not just functional; it’s a fun way to express your style. Enjoy the process as you enhance your landscape with these creative designs!
11. Fencing: Unique Privacy Solutions
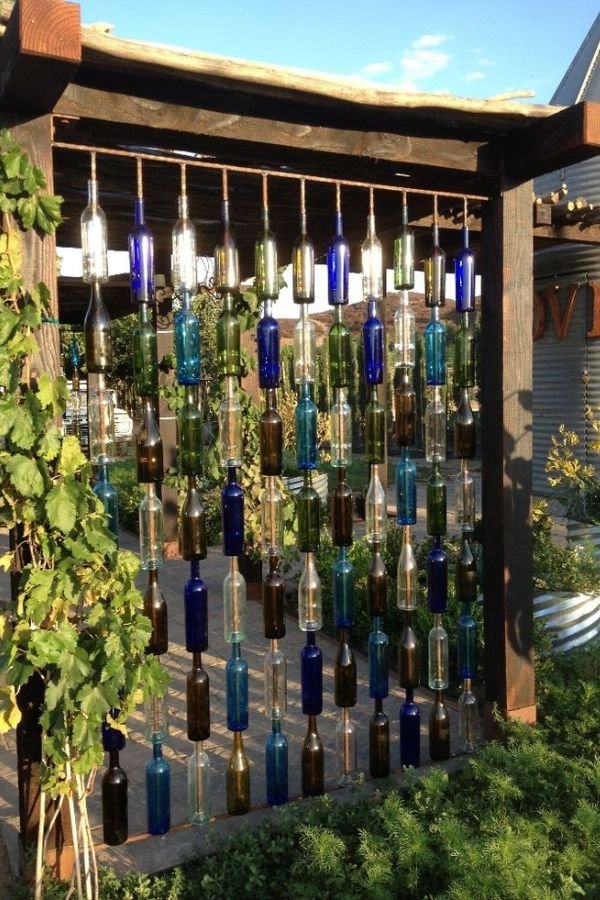
Using old wine bottles for fencing can create a unique and stylish privacy solution in your landscape. Consider these ideas:
- Bottle Wall: Arrange bottles vertically to form a colorful wall. This not only blocks the view but also adds beauty to your garden.
- Decorative Borders: Use bottles as borders along pathways or flower beds. They can help define spaces while offering some privacy.
- Mixed Materials: Combine wine bottles with wood or wire to create a hybrid fence. This adds texture and can enhance your garden’s look.
Here are some tips for building a wine bottle fence:
- Choose a Design: Plan your layout ahead of time. You can go for a straight line, curve, or even a zigzag pattern.
- Secure the Bottles: Use mortar or concrete to keep the bottles in place. Ensure they are stable, especially in windy areas.
- Consider Color and Height: Mix different colors and heights of bottles. This will create an interesting visual effect.
Old wine bottles are not just for decoration; they can also serve a practical purpose. Embrace their charm in your landscape for a fence that stands out and protects your privacy.
12. Flower Vases: Rustic Centerpieces
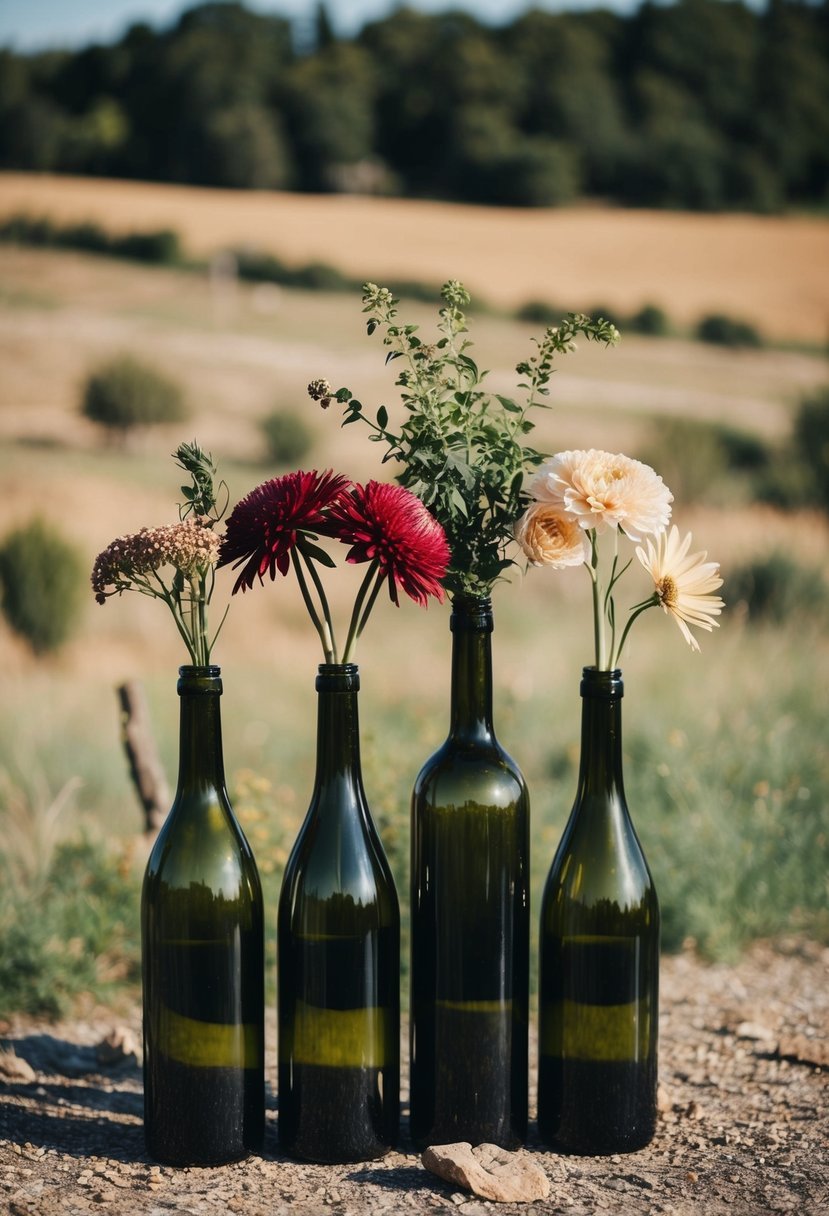
Using old wine bottles as flower vases adds a rustic charm to your garden or home décor. They make unique centerpieces that can fit into any style.
Start by cleaning the bottles thoroughly. Remove labels and ensure there’s no residue. A simple soak in warm, soapy water works well.
You can leave the bottles clear for a classic look, or paint them for a pop of color. Use glass paint for a translucent finish or spray paint for bold hues.
Tips for Arranging Flowers
- Choose Your Flowers: Opt for seasonal blooms like daisies or sunflowers.
- Mix Heights: Use bottles of different sizes for visual interest.
- Add Filler: Use greenery like ferns or eucalyptus as a base.
For a whimsical touch, try cutting the necks off some bottles. This creates wider vases, allowing for larger floral arrangements.
You can place the wine bottle vases on tables for gatherings or line them along pathways for a welcoming vibe. Grouping several bottles together can make a stunning display.
These vases not only help recycle bottles but also bring a personal touch to your space. Embrace your creativity and enjoy the process of designing your rustic centerpieces!
13. Fire Pit Surrounds: Cozy Gatherings
Creating a welcoming fire pit area can transform your outdoor space. Your fire pit should be surrounded by inviting features that enhance comfort and style.
Materials to Consider:
- Stone or Brick: Durable and classic options create a sturdy base.
- Wooden Benches: Comfortable seating can be made from reclaimed wood.
- Pavers: Easy to arrange and maintain, pavers can outline your space.
Plants can add warmth to the area. Consider using:
- Low shrubs to define the space.
- Colorful flowers for visual appeal.
- Evergreens for year-round greenery.
You can also use your old wine bottles creatively. Place them around the fire pit for a rustic look. Fill them with fairy lights or candles for a magical touch at night.
Seating Arrangements:
- Flexible Chairs: Choose lightweight chairs that are easy to move.
- Outdoor Cushions: Add cushions for a cozy feel and easy color pops.
Safety From the Flames:
Always use stones or gravel around the fire pit. This helps prevent grass fires and keeps your gatherings safe.
With thoughtful design and welcoming touches, your fire pit can be the perfect spot for cozy gatherings. It’s about making a space where you and your guests can relax and enjoy the warmth.
14. Herb Spiral: Efficient Gardening Design
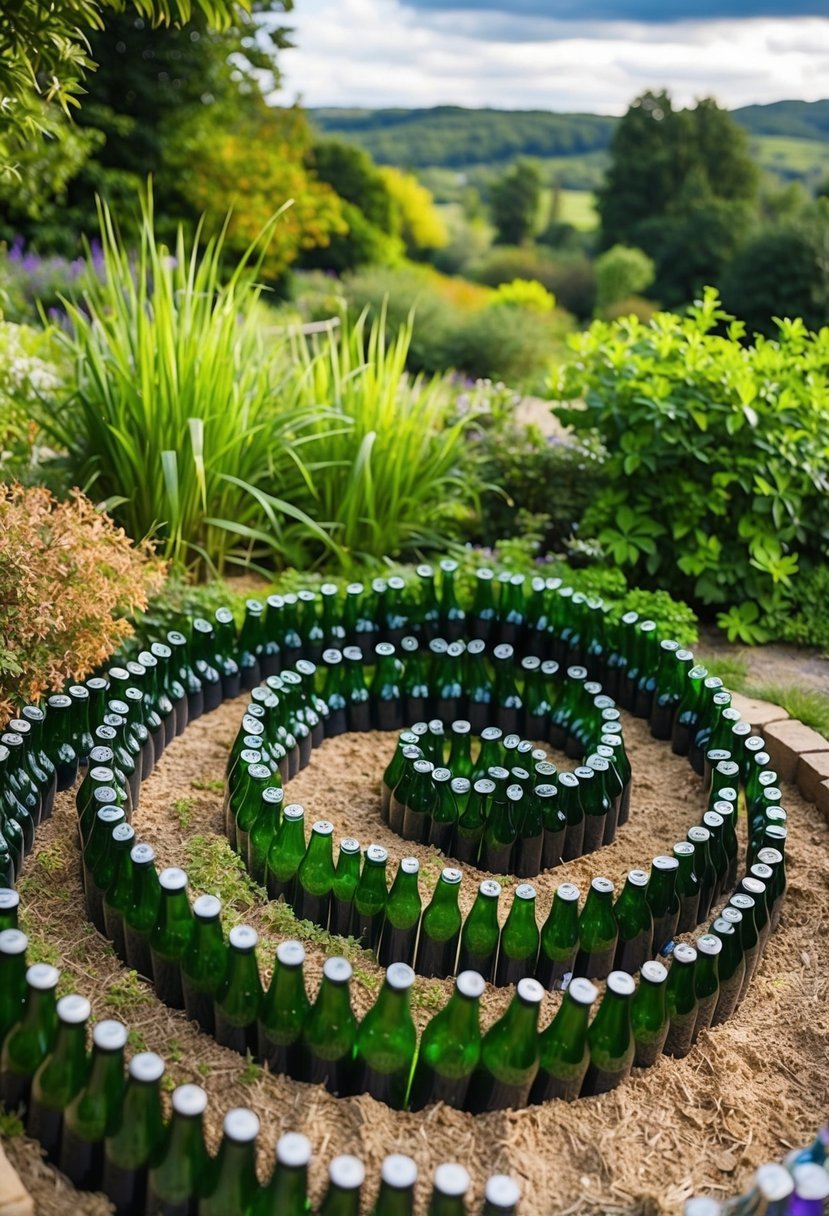
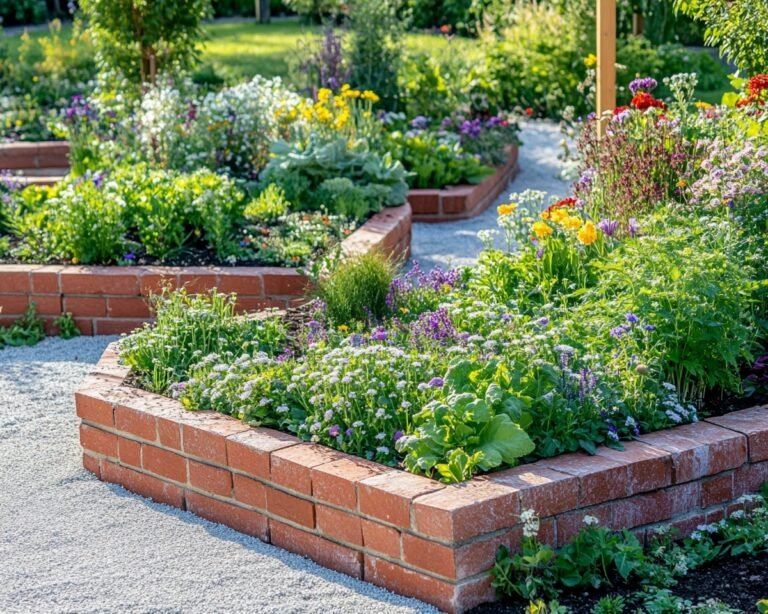
An herb spiral is a smart way to create a compact garden that maximizes space. It consists of a spiral structure made from stones, bricks, or other materials. This design helps you grow a variety of herbs in a small area.
Benefits of Herb Spirals
- Space-Saving: The spiral design takes up less ground space while providing vertical growing options.
- Microclimates: Different heights in the spiral create varying temperatures and moisture levels. This allows you to grow herbs that prefer different conditions.
- Accessibility: You can reach all parts of the spiral easily, which makes planting and harvesting simple.
Building Your Herb Spiral
- Materials Needed:
- Stones or bricks
- Soil and compost
- Herbs of your choice (like basil, mint, or oregano)
- Steps:
- Start by marking the center point of the spiral.
- Create the base layer using larger stones, forming a circle.
- Gradually build upwards with smaller stones as you spiral out.
Planting Tips
Choose herbs that complement each other. For instance, plant sun-loving herbs like rosemary at the top while placing moisture-loving herbs like mint lower down. This way, you can enjoy fresh herbs within arm’s reach.
![How To Lay Brick Border Garden Edging - [11 Easy DIY Step] 19 How To Lay Brick Border Garden Edging - [11 Easy DIY Step]](https://homesteadask.com/wp-content/uploads/2024/09/How-To-Lay-Brick-Border-Garden-Edging-11-Easy-DIY-Step-1-768x614.jpg)
![12+ Lawn Edging Ideas on a Slope - [Keep Grass in Check] 20 12+ Lawn Edging Ideas on a Slope - [Keep Grass in Check]](https://homesteadask.com/wp-content/uploads/2024/09/12-Lawn-Edging-Ideas-on-a-Slope-Keep-Grass-in-Check-768x614.jpg)
