14+ Recycled DIY Raised Garden Bed Ideas for Stunning Landscapes
As a gardener, I’ve always looked for ways to create beautiful and functional spaces in my yard without breaking the bank. Recycled raised garden beds are not only budget-friendly but also environmentally friendly. You can reuse materials you might otherwise throw away.
Whether you have old wooden pallets, cinder blocks, or even plastic bottles lying around, you can transform them into attractive garden beds. These beds will help you grow your favorite vegetables and flowers.
If you’re curious about how to get started on your own recycled garden bed, I’ll walk you through some of the best ideas I’ve found that combine practicality with sustainability. With just a little effort and imagination, you can create a thriving garden space that reflects your personality and values.
1. Create Spiral Herb Garden Bed From Bricks
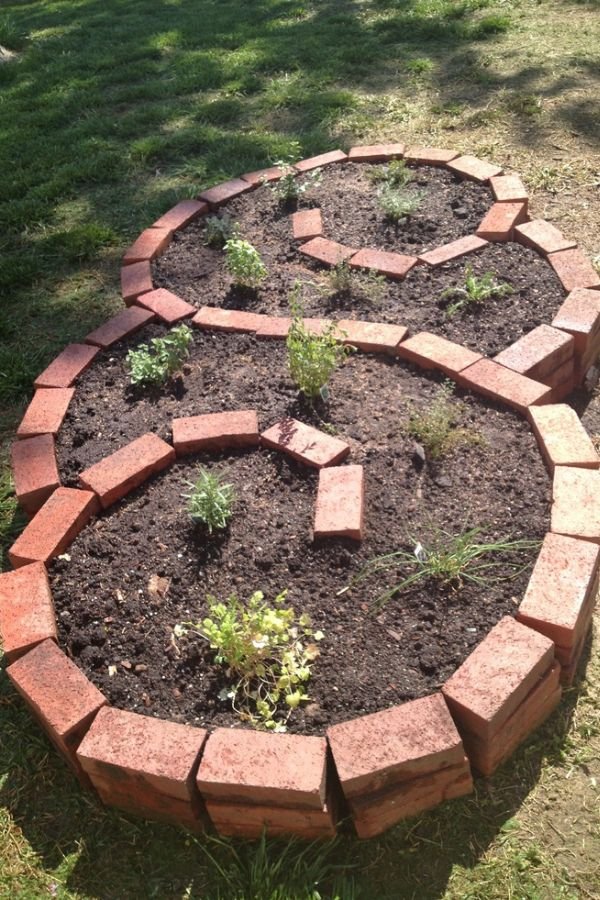
Building a spiral herb garden bed from bricks is a fun and creative project. I find that it not only saves space but also adds visual interest to my garden.
To start, gather your materials. You’ll need:
- Reclaimed bricks
- Soil
- Compost
- Herbs of your choice
First, I outline the shape on the ground. A typical spiral is about 2 meters in diameter.
Next, I begin stacking the bricks to form the spiral. I start low at the outer edge and gradually stack them higher as I move toward the center. This creates different levels for planting.
As I build, I fill the gaps between the bricks with a mix of soil and compost. This setup allows for good drainage and soil aeration.
Once the spiral is complete, I plant a variety of herbs. I love using basil, thyme, and mint because they thrive in this setup. The different heights create unique growing conditions that benefit all the plants.
Maintaining the spiral garden bed is simple. I water regularly, especially during dry spells. The bricks also help retain heat, which is great for the herbs.
For more detailed guidance, you can check out this helpful resource on how to construct a herb spiral here.
2. Raised Garden Bed Using Bricks Without Mortar
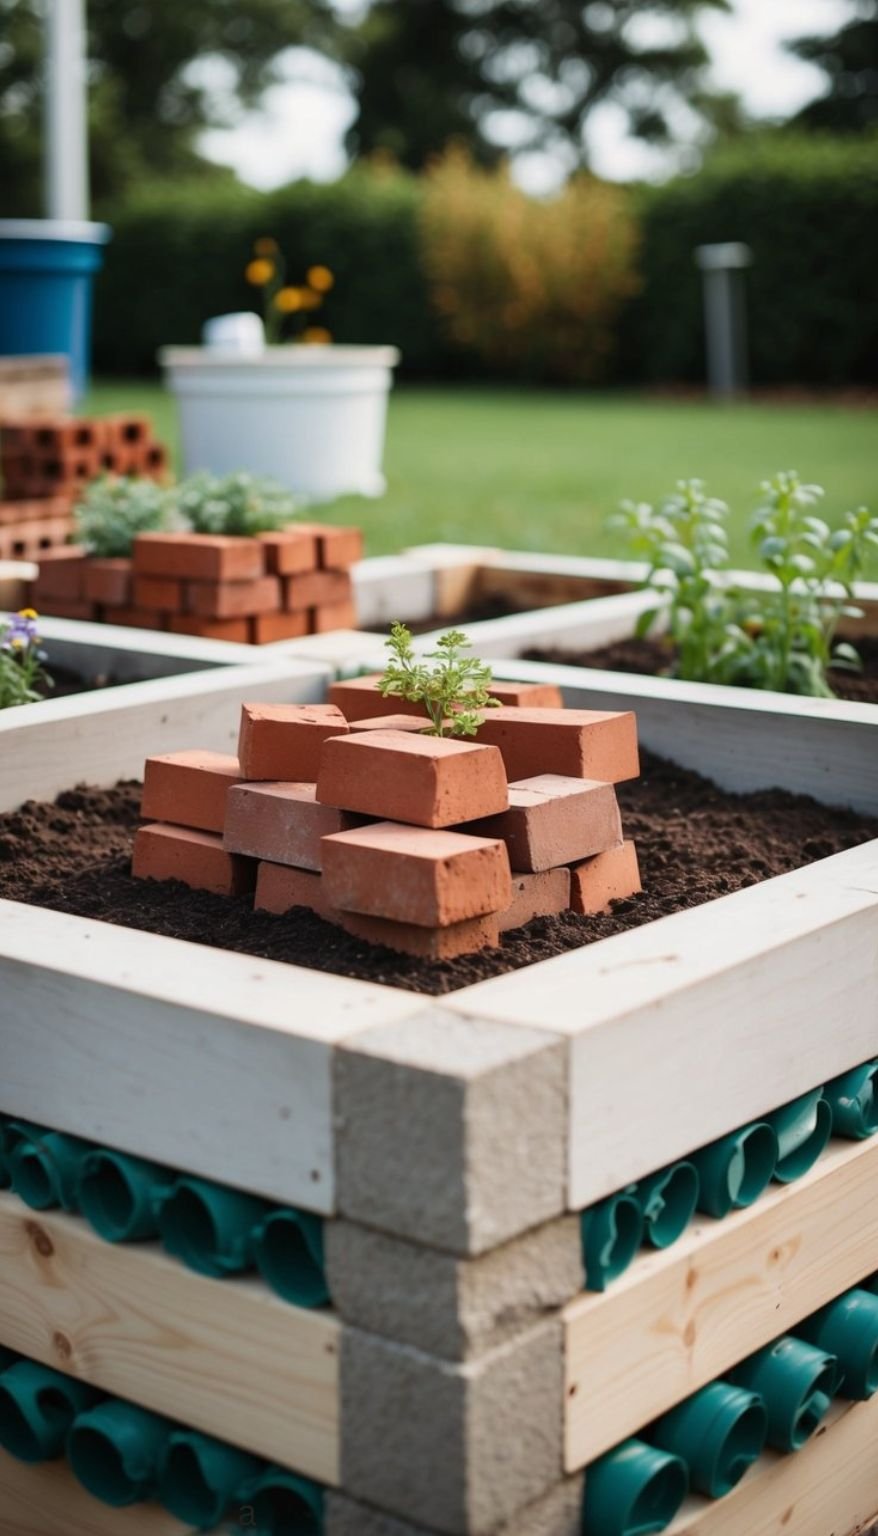
Building a raised garden bed with bricks without using mortar is a fun and effective way to create a sturdy garden space. I enjoy this method because it’s simple and allows for easy adjustments.
First, select your bricks. Make sure they are clean and in good shape. You can use old bricks from a construction site or even buy new ones.
To start, prepare the area. I find it helpful to clear the ground of weeds and grass. Then, lay out the first row of bricks to create a solid base.
Here are some tips for stacking:
- Stability: Ensure the first layer is level. This keeps the wall straight and strong.
- Overlap: When placing the next layer, stagger the bricks. This gives better support, much like a brick wall.
For added support, I recommend using PVC pipes filled with concrete. Insert them vertically in the corners to reinforce the structure further.
I keep my beds limited to a height of 3 feet and a width of 4 feet. This makes it easier to reach the plants inside without straining.
Lastly, monitor for settling after heavy rain. If there are any gaps, fill them with gravel to keep everything in place. My brick garden beds have held up beautifully, and the rustic look enhances my yard!
3. Use Spaces In Cinder Block Raised Garden
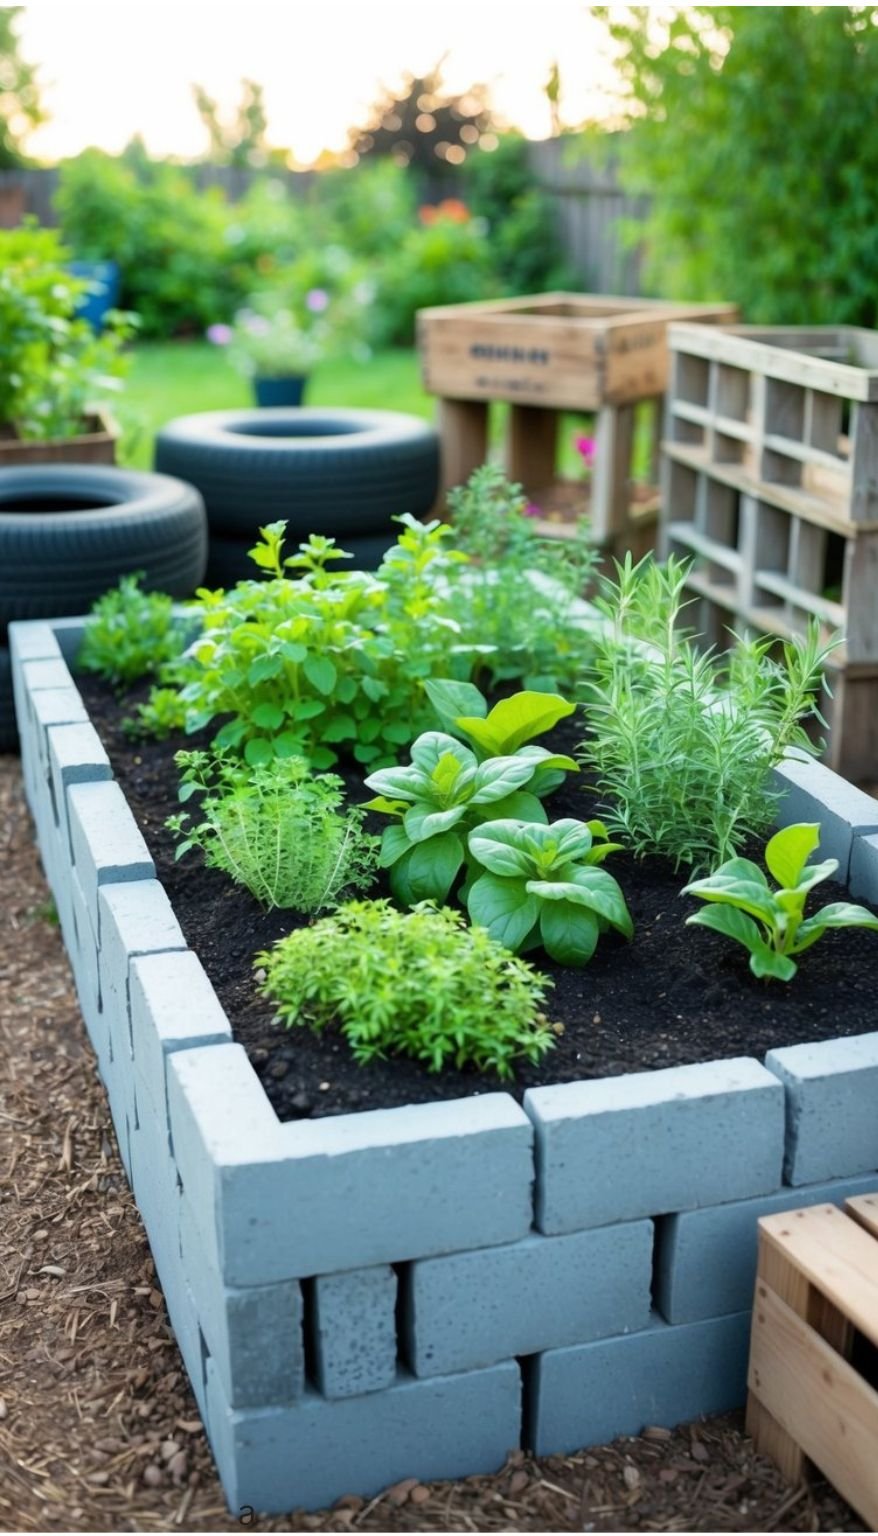
Creating a cinder block raised garden bed is a smart way to utilize space. I love the flexibility these blocks offer when it comes to arranging my plants.
One effective method is to leave spaces between the blocks. This not only adds visual interest but also allows for better drainage. Here are some ideas for using those spaces:
- Plant herbs: Small herbs like basil or parsley grow well in gaps. They’re easy to access while cooking.
- Add flowers: Bright flowers can attract pollinators and add color to your garden.
- Use the interior: I’ve filled the center of my blocks with soil and planted succulents. They thrive in the warm environment.
Arranging the blocks in different patterns can also create pathways. This makes it easy for me to reach all areas of my garden without stepping on the soil.
I recommend considering vertical planting too. Stack blocks to create tall beds. This maximizes your garden’s vertical space and adds dimension.
Remember to check the pH balance of the soil when using cinder blocks. Old blocks may leach ash, affecting the soil quality. Keeping an eye on this will help my plants thrive.
Using spaces in a cinder block raised garden bed not only enhances beauty but also promotes healthier plants. It’s a simple strategy that makes gardening enjoyable!
4. Recycle Plastic Bottles For A Colorful Raised Garden Bed
Using plastic bottles for a raised garden bed is both fun and practical. I enjoy transforming ordinary bottles into vibrant planters. Here’s how I do it.
First, gather your materials. You’ll need:
- Plastic bottles (various sizes)
- Garden soil
- Decorative items (paint, markers, or stickers)
Next, prepare the bottles. Cut them horizontally to create planting spaces. The flat sides will provide a larger area for roots to spread.
I recommend making small holes at the bottom of each bottle. This helps drain excess water and prevents root rot.
Once they are ready, I fill the bottles with soil. A mix of potting soil and compost works great for nutrients.
Now comes the fun part: decorating! I like to paint the bottles in bright colors or add fun designs. This not only looks great but also adds personality to my garden.
After decorating, arrange the bottles in a sunny spot. I place them close together for a cozy look. You can grow herbs, flowers, or small vegetables in them.
Using recycled plastic bottles creates an eye-catching display in my garden while helping the environment. It’s a simple way to add color and creativity to my outdoor space. Give it a try, and you’ll be amazed at the results!
5. Fabric Raised Garden Beds Encourage Air Pruning
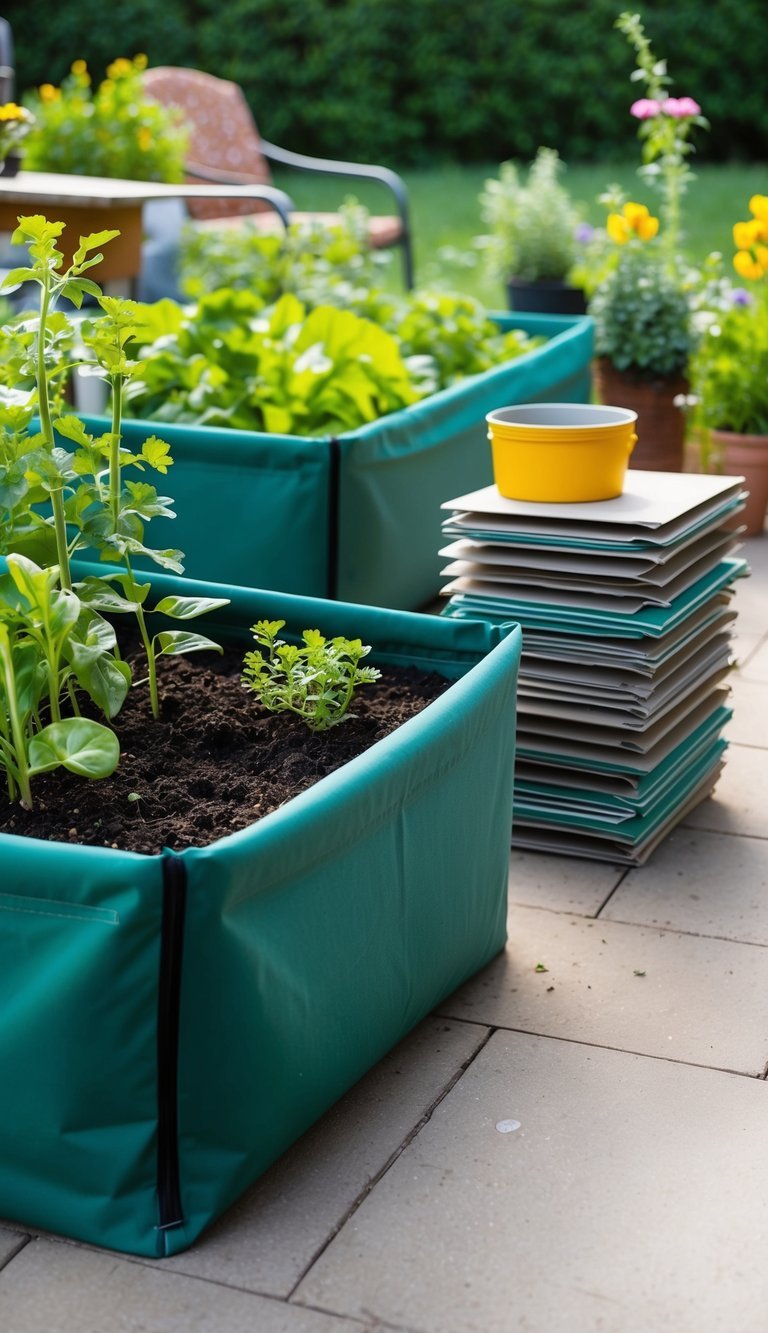
Using fabric for raised garden beds has many benefits, one of which is air pruning. This process happens when roots reach the side of the fabric and are exposed to air.
When roots hit the breathable fabric, they stop growing as they search for more nutrients. This action encourages the growth of new, smaller roots. The result? A healthier and more robust root system.
Benefits of Air Pruning:
- Improved Drainage: Fabric allows excess water to escape, preventing root rot.
- More Nutrients: A dense network of roots can absorb more nutrients effectively.
- Healthy Growth: Plants are less likely to become root-bound, which is great for overall plant health.
I find that with air pruning, my plants tend to be more vigorous. They also recover faster from stress, whether from transplanting or changing weather conditions.
Fabric raised beds are lightweight and easy to move. If I need to change the layout of my garden, I can simply reposition them.
Overall, the positive impact of air pruning on root health makes fabric raised garden beds an excellent choice for any gardener. By promoting healthier roots, I’m setting my plants up for success from the start.
6. Stylish Steel Raised Garden Bed By Formboss
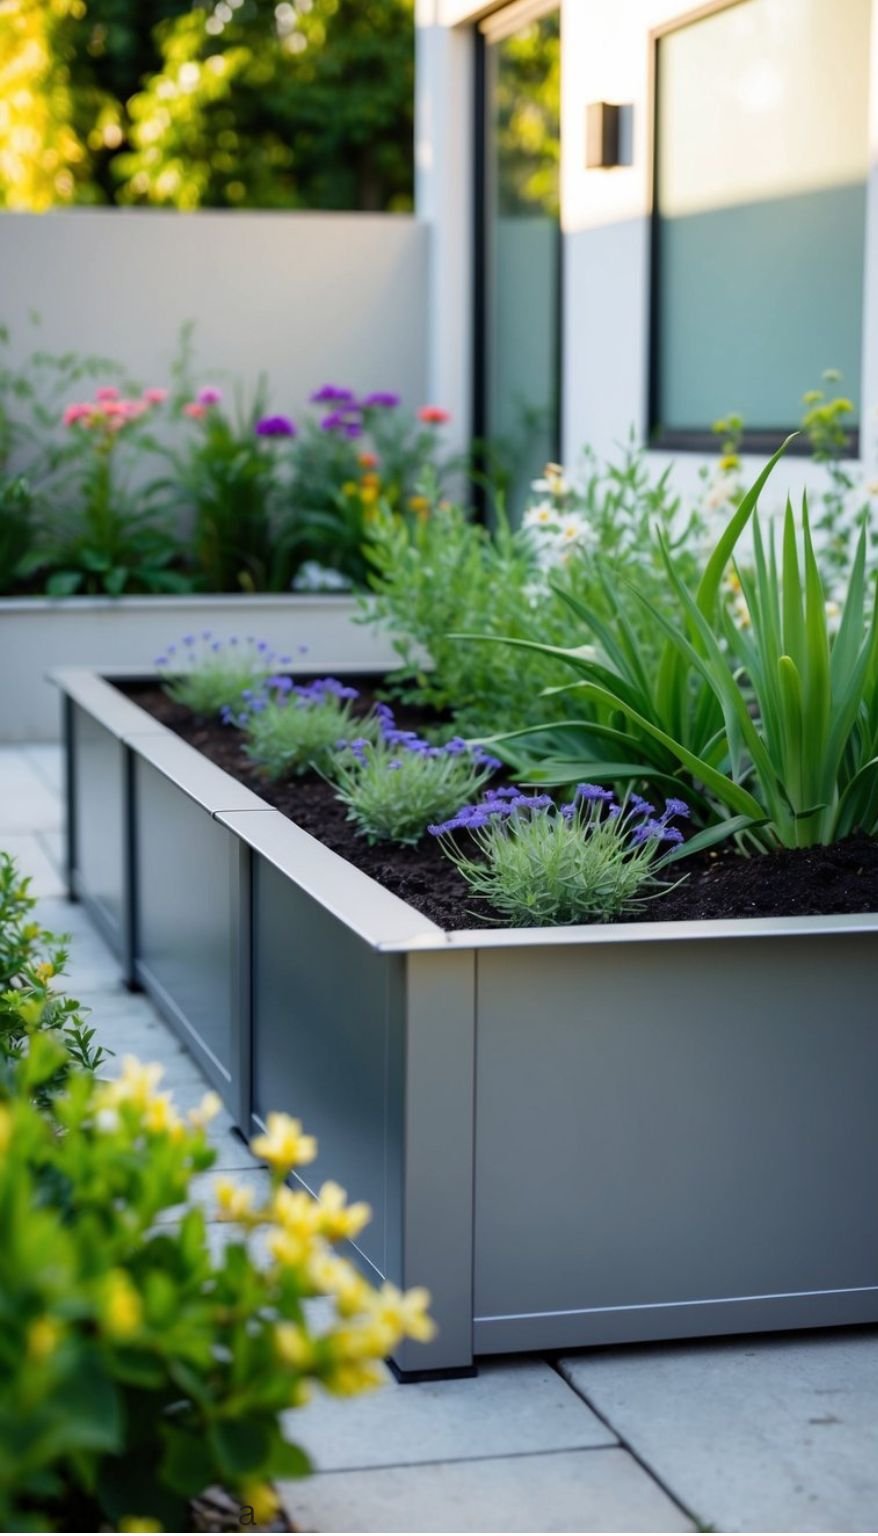
I’ve found that the Stylish Steel Raised Garden Bed by Formboss is an excellent choice for gardeners looking for durability and modern design. Made from high-quality sheet metal, it comes in various thicknesses, making it suitable for any garden setup.
What I love about these beds is their ability to follow unique shapes. This makes them perfect for irregularly shaped gardens. It’s easy to create a stunning layout.
Key Features:
- Durable Materials: The steel is built to last through the seasons.
- Versatility: Available in different sizes, so you can choose what fits your space.
- Customizable: You can paint them or leave them in their natural metal finish for a sleek look.
Setting up a Formboss garden bed is simple. Just prepare your area, level the ground, and secure the steel edges. The sturdy design provides excellent support for a variety of plants.
I appreciate that these beds can be filled with high-quality soil, promoting healthy growth for vegetables, herbs, and flowers. Whether I’m planting tomatoes or vibrant flowers, these raised beds enhance my gardening experience while also adding visual appeal to my yard.
7. Raised Garden Bed Using Logs
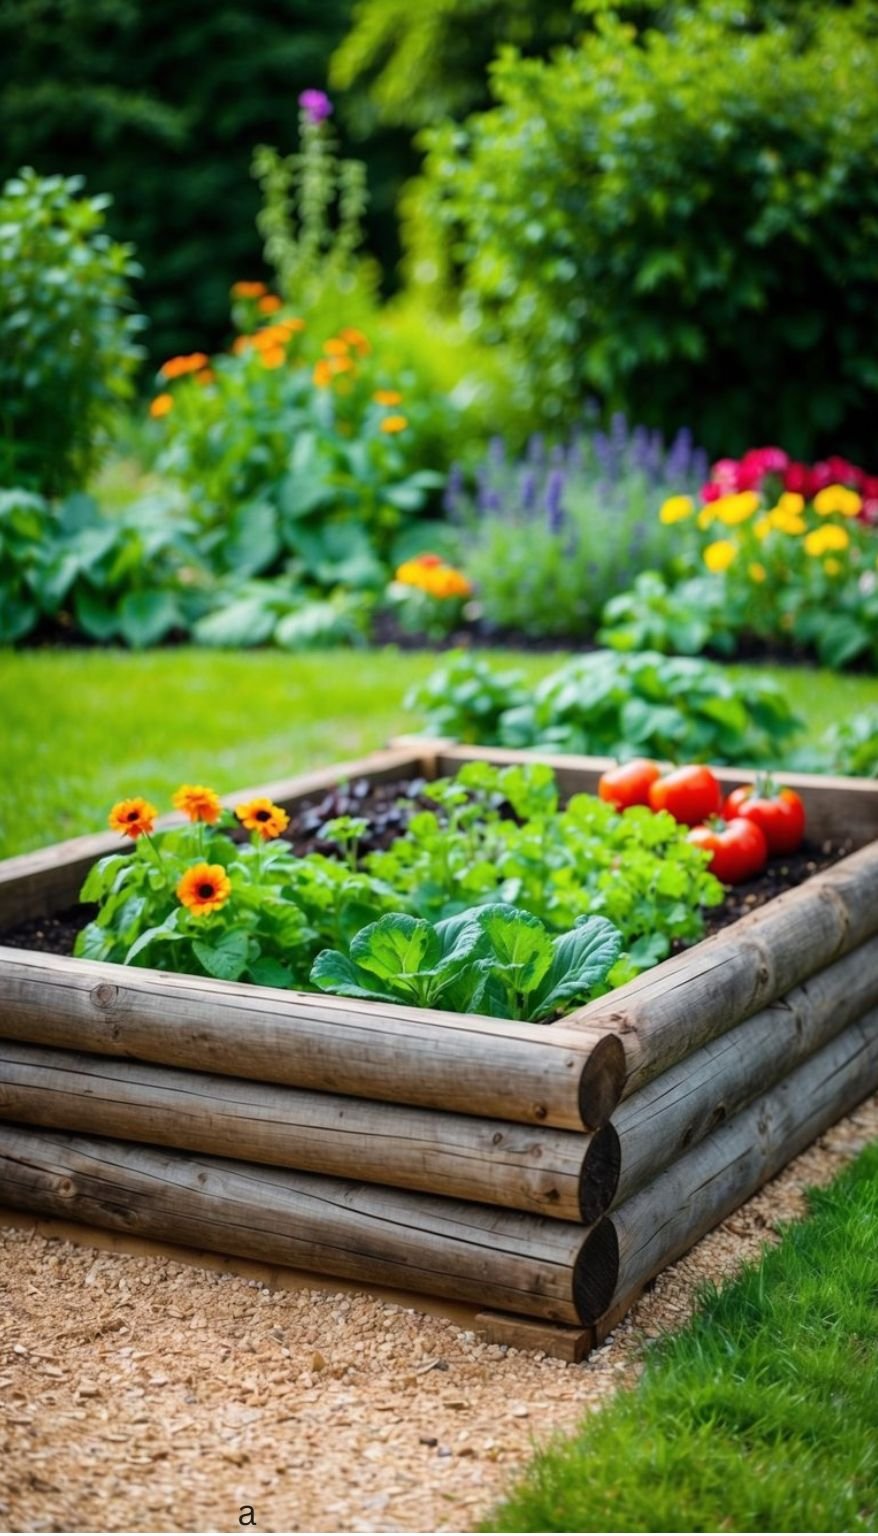
Creating a raised garden bed with logs is a fun project that adds a rustic charm to my garden. It’s also a great way to recycle materials and make good use of fallen trees or branches.
Materials Needed
- Logs: Choose logs of similar size for evenness.
- Shovel: For clearing the area.
- Cardboard: To help prevent weeds.
- Soil: Quality garden soil to fill the bed.
Steps to Build
- Plan the Size: I decide on the dimensions based on my available space. A common size is 4×8 feet.
- Clear the Area: Using a shovel, I clear the ground of rocks and weeds. This prepares a flat surface for the logs.
- Lay Cardboard: I place cardboard on the ground inside the marked area. This helps block weeds and keeps moisture in the soil.
- Arrange the Logs: I stack the logs around the cardboard. I make sure to make them snug and sturdy.
- Fill with Soil: Finally, I fill the raised bed with quality garden soil, ready to plant!
This style of garden bed is not only functional but also environmentally friendly. I enjoy the natural look it brings to my outdoor space while providing a great growing environment for my plants. Plus, logs can last for many seasons with the right care.
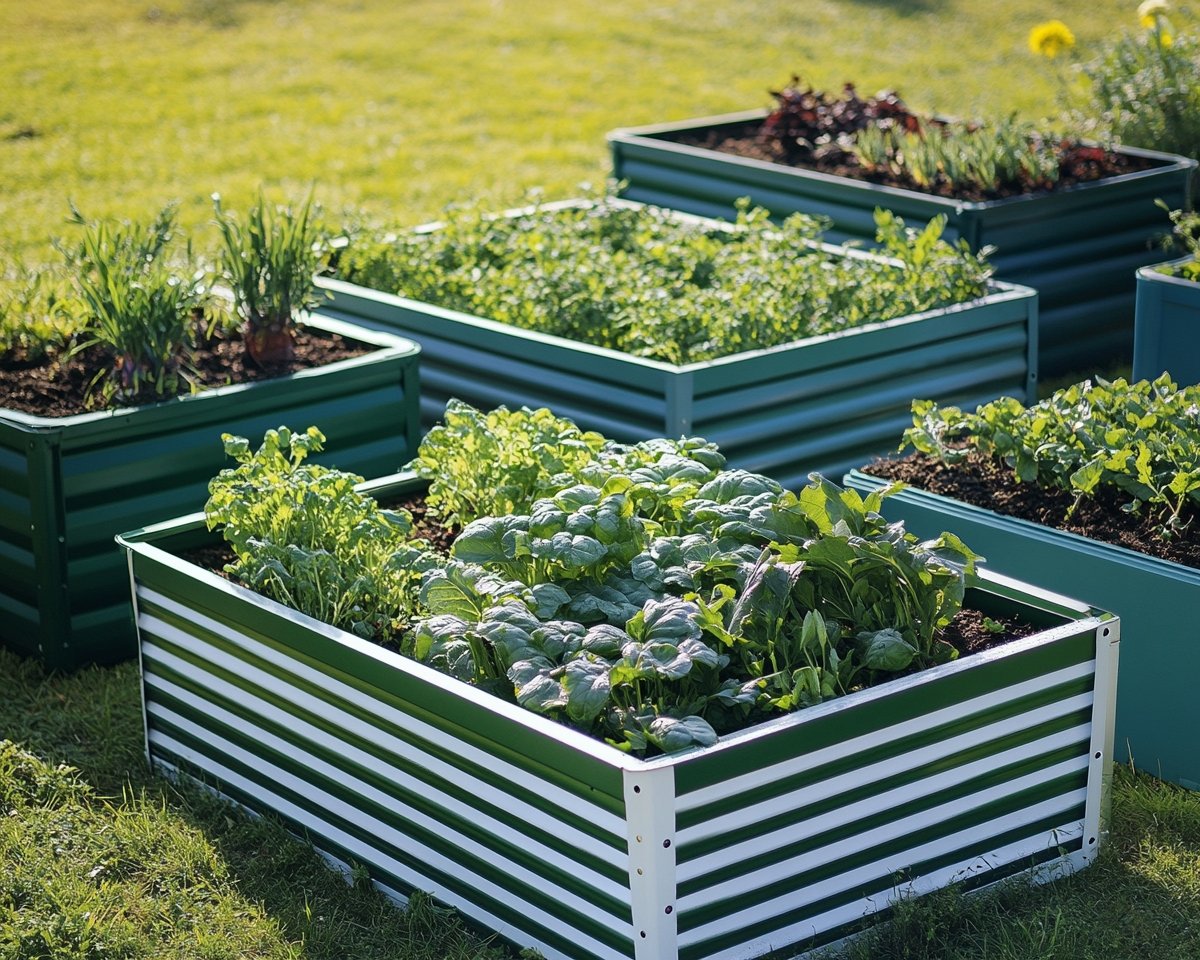
8. Powder-Coated Metal Raised Garden Beds
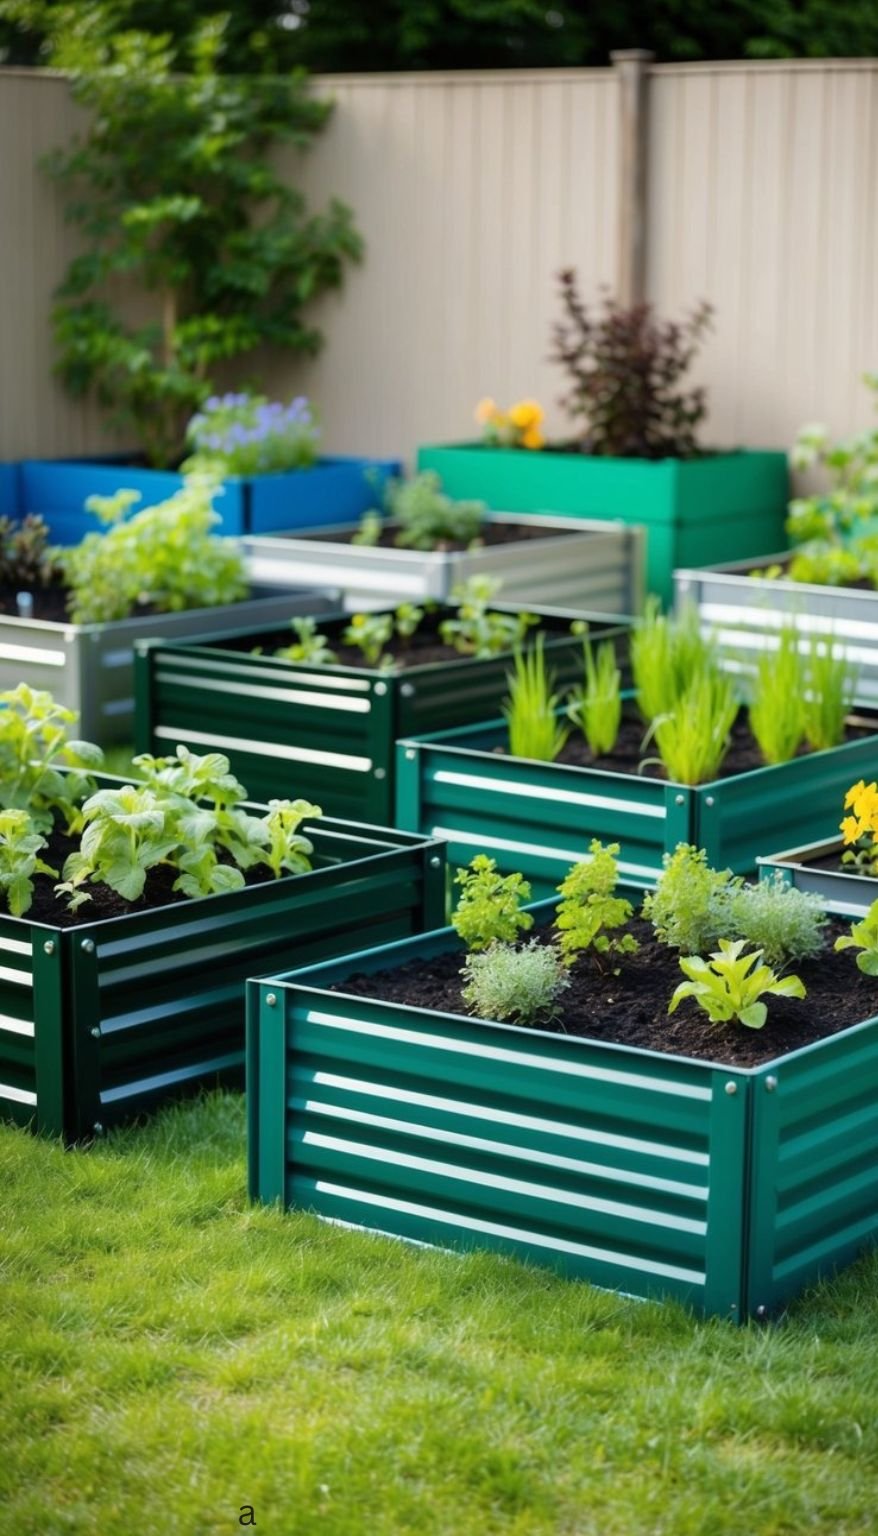
I find powder-coated metal raised garden beds an excellent choice for my gardening projects. They offer durability and style, making them perfect for various environments.
These beds are coated with a special finish that protects them from rust and corrosion. This means they can withstand harsh weather conditions, ensuring my plants thrive.
Benefits of Powder-Coated Metal Beds:
- Durability: The coating enhances the lifespan of the metal, reducing the need for replacements.
- Low Maintenance: They are easy to clean and maintain, making gardening less of a chore.
- Stylish Appearance: They come in various colors and designs, adding a modern look to my garden.
When selecting a powder-coated bed, consider the size. Common dimensions include:
| Size | Planting Space |
|---|---|
| 4′ x 2′ | Good for herbs |
| 6′ x 3′ | Ideal for vegetables |
| 8′ x 4′ | Great for larger gardens |
I also appreciate that these beds can be easily assembled. Most come with straightforward instructions and require simple tools.
In addition, they provide excellent drainage and soil aeration. This helps my plants to grow strong and healthy.
Overall, powder-coated metal raised garden beds have been a robust addition to my gardening experience.
9. Upcycle Old Tires For Raised Garden Beds
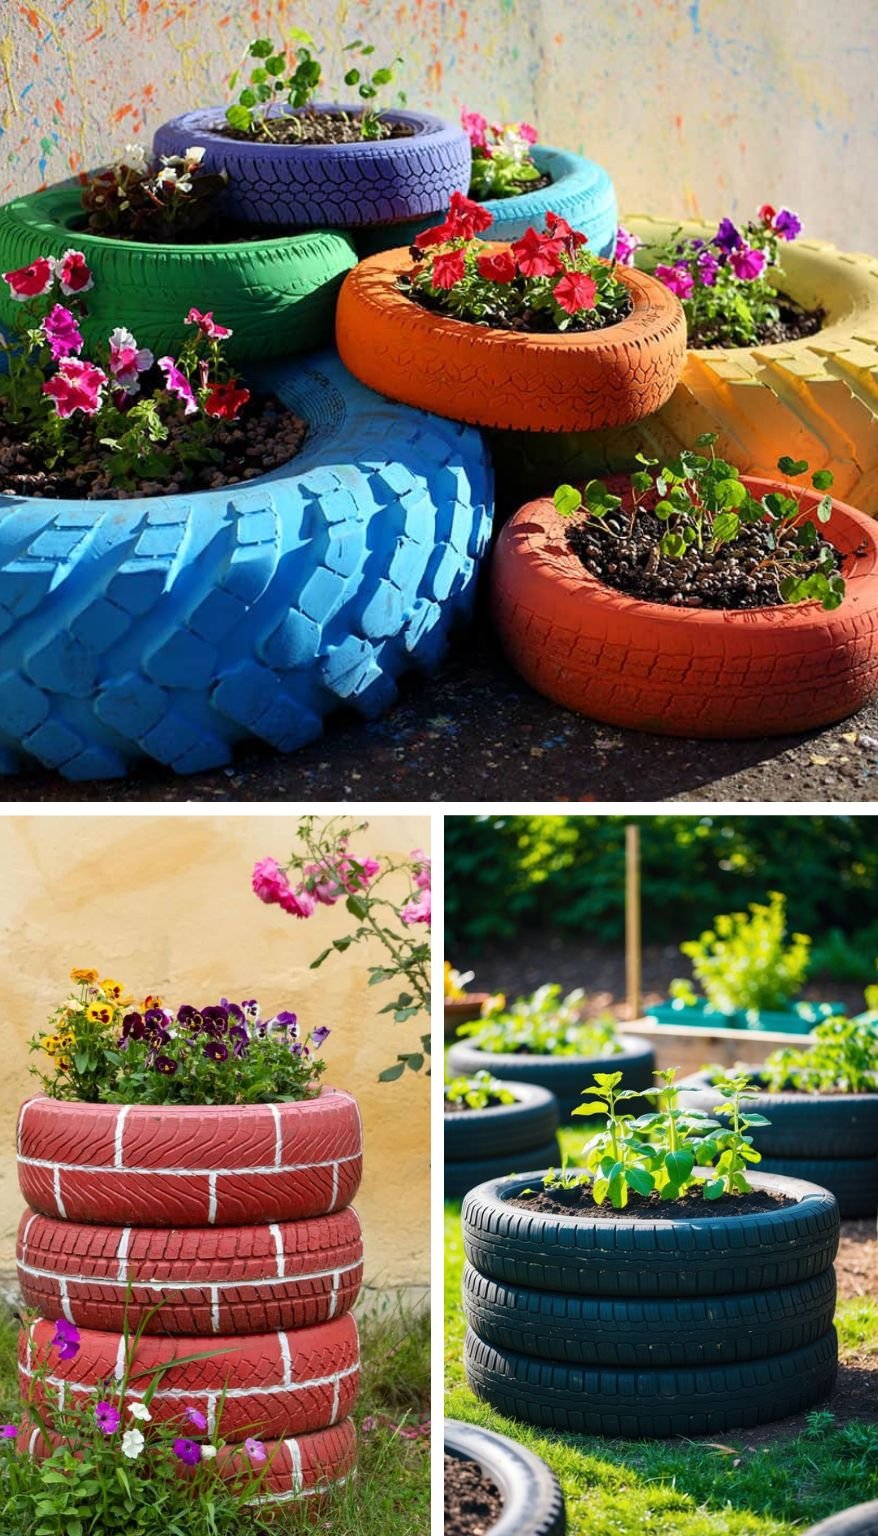
Using old tires for raised garden beds is a fun and eco-friendly project. I find it a great way to recycle and create unique growing spaces.
First, pick a few tires. You can use different sizes for variety. I often stack them for height, giving my plants more room to grow.
Next, I fill the tires with soil. Make sure to choose quality soil that suits your plants. You can even add compost to improve fertility.
Benefits of Using Tires:
- Drainage: Tires provide excellent drainage, preventing waterlogging.
- Warmth: The rubber retains heat, helping my plants thrive in cooler weather.
- Pest Control: The height deters some pests, keeping my garden healthier.
To create visual interest, I sometimes paint the tires with non-toxic, outdoor paint. This adds a splash of color to my garden.
If you’re worried about the rubber leaching into the soil, it’s easy to line the inside with landscape fabric. This keeps the soil contained and limits direct contact.
In my experience, using old tires not only helps the environment but also adds creativity to my garden. I love sharing tips and seeing how others use tires in their gardening projects!
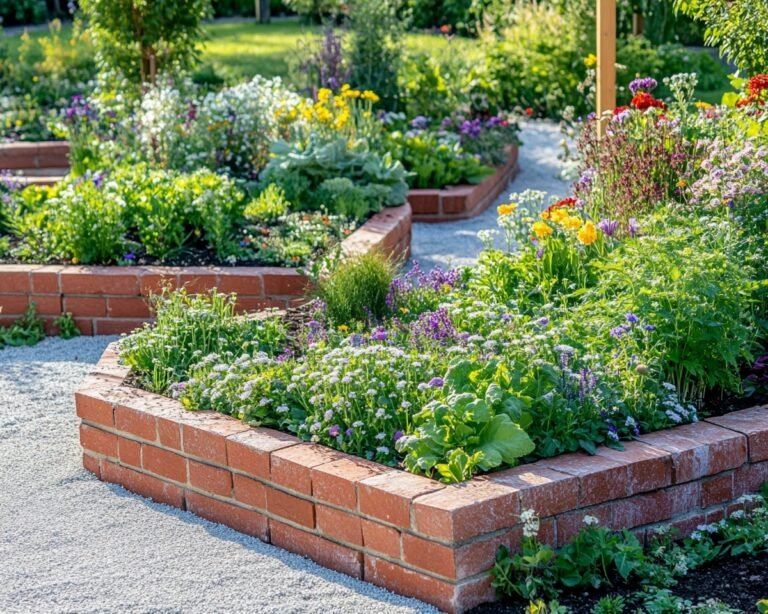
10. Classic Red Brick Stacked Raised Garden Bed
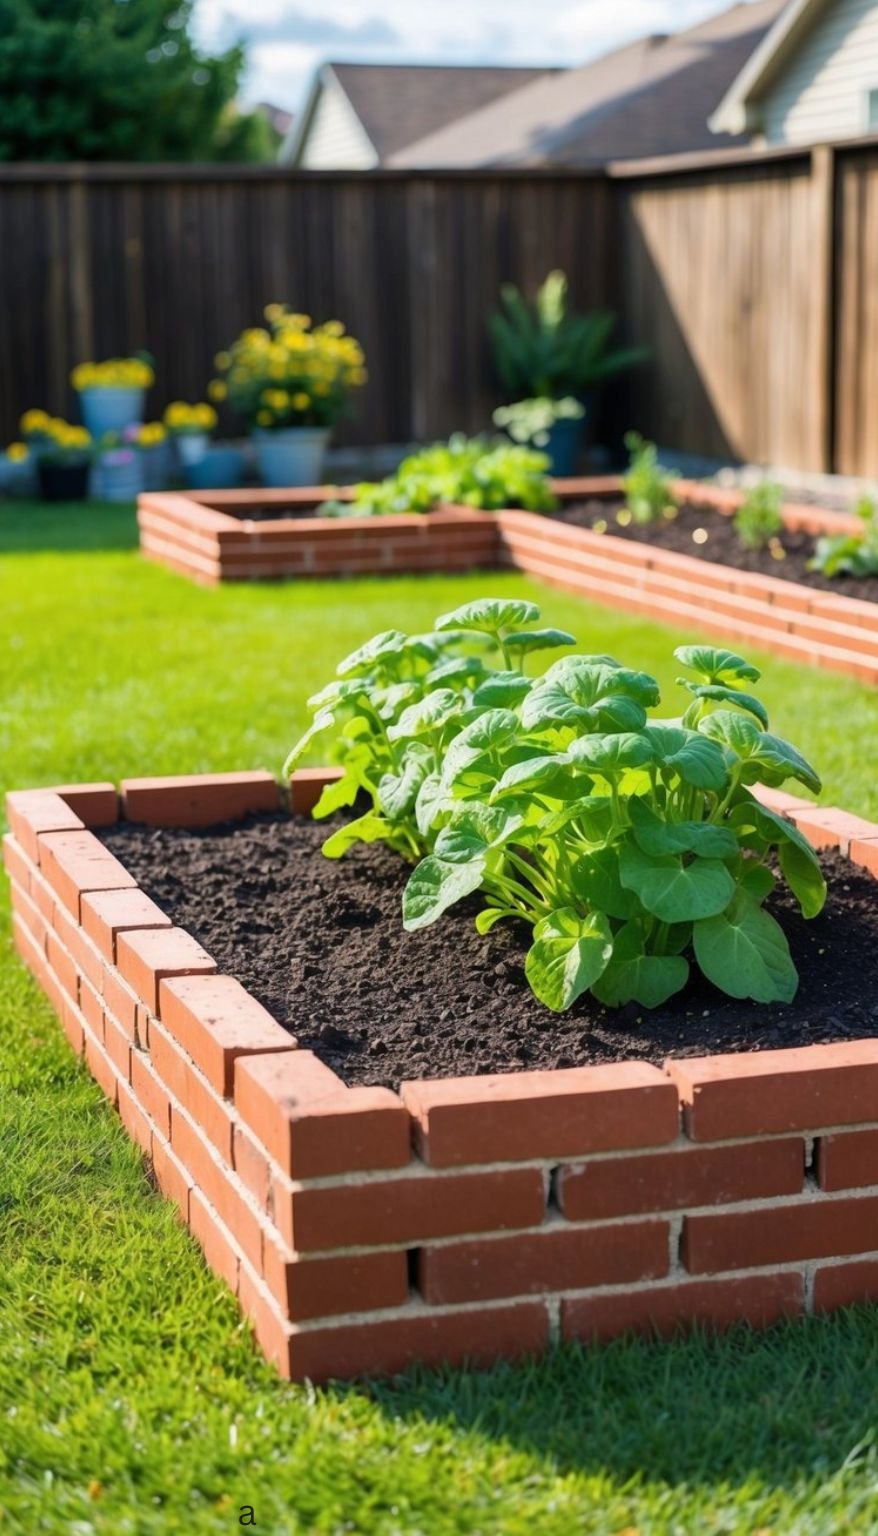
Building a classic red brick stacked raised garden bed is a fantastic way to enhance my gardening space. Bricks are durable and provide a traditional look that fits beautifully in any yard.
To start, I gather reclaimed bricks. It’s important to ensure that they haven’t been exposed to harmful chemicals. This way, my plants will grow in a safe environment.
Steps to Build
- Choose a Location: I find a sunny spot with at least five hours of sunlight daily.
- Prepare the Area:
I clear the area of weeds and debris. - Lay the Bricks:
I stack the bricks in a rectangular shape, making sure they are level. Each layer should fit snugly against the last, ensuring stability. - Fill with Soil:
Once the structure is built, I fill it with a good quality raised bed soil mix. This helps ensure my plants have the nutrients they need. - Water Thoroughly:
After filling the bed, I water the soil well. This helps settle it and removes any air pockets.
Using bricks makes it easy to create a sturdy garden bed that stands out. Plus, it’s a great way to recycle materials while making my gardening space functional and beautiful.
11. Build Raised Garden Bed Using Quarry Stones
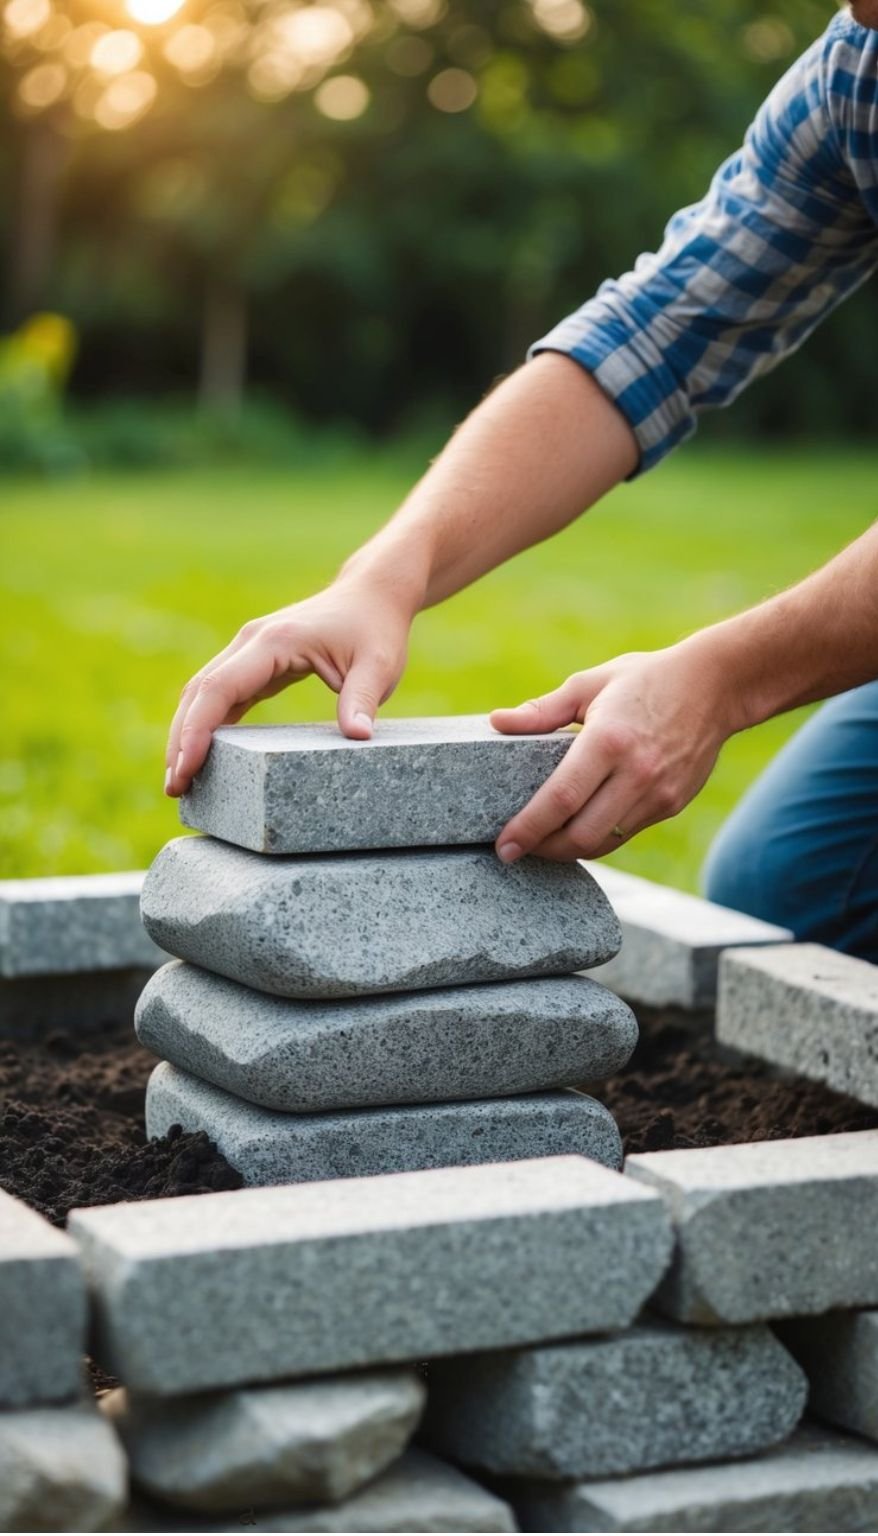
Building a raised garden bed with quarry stones is not only practical, but it also adds a natural touch to the garden. I love using these stones because they blend well with the landscape.
First, gather your materials. You’ll need:
- Quarry stones (choose sizes that fit your design)
- Shovel for digging
- Level to ensure the stones are even
- Landscape fabric to keep weeds out
Start by choosing a location with good sunlight. I usually mark the area with stakes and string to outline the bed.
Next, dig a shallow trench where the stones will sit. This helps keep the stones stable. Then, lay the first layer of stones, ensuring that they fit tightly together.
After that, use a level to check the height and adjust as needed. I often find it helpful to add a bit of soil or gravel underneath the stones for extra stability.
Once the first layer is set, continue stacking the stones to your desired height. Make sure each layer is level for a neat look.
Finally, line the inside with landscape fabric. This step prevents soil from spilling out while letting water through.
Filling your bed with rich soil is the last step. Now, you’re ready to plant your favorite flowers or veggies!
12. Raised Garden Beds Using Farm Water Troughs
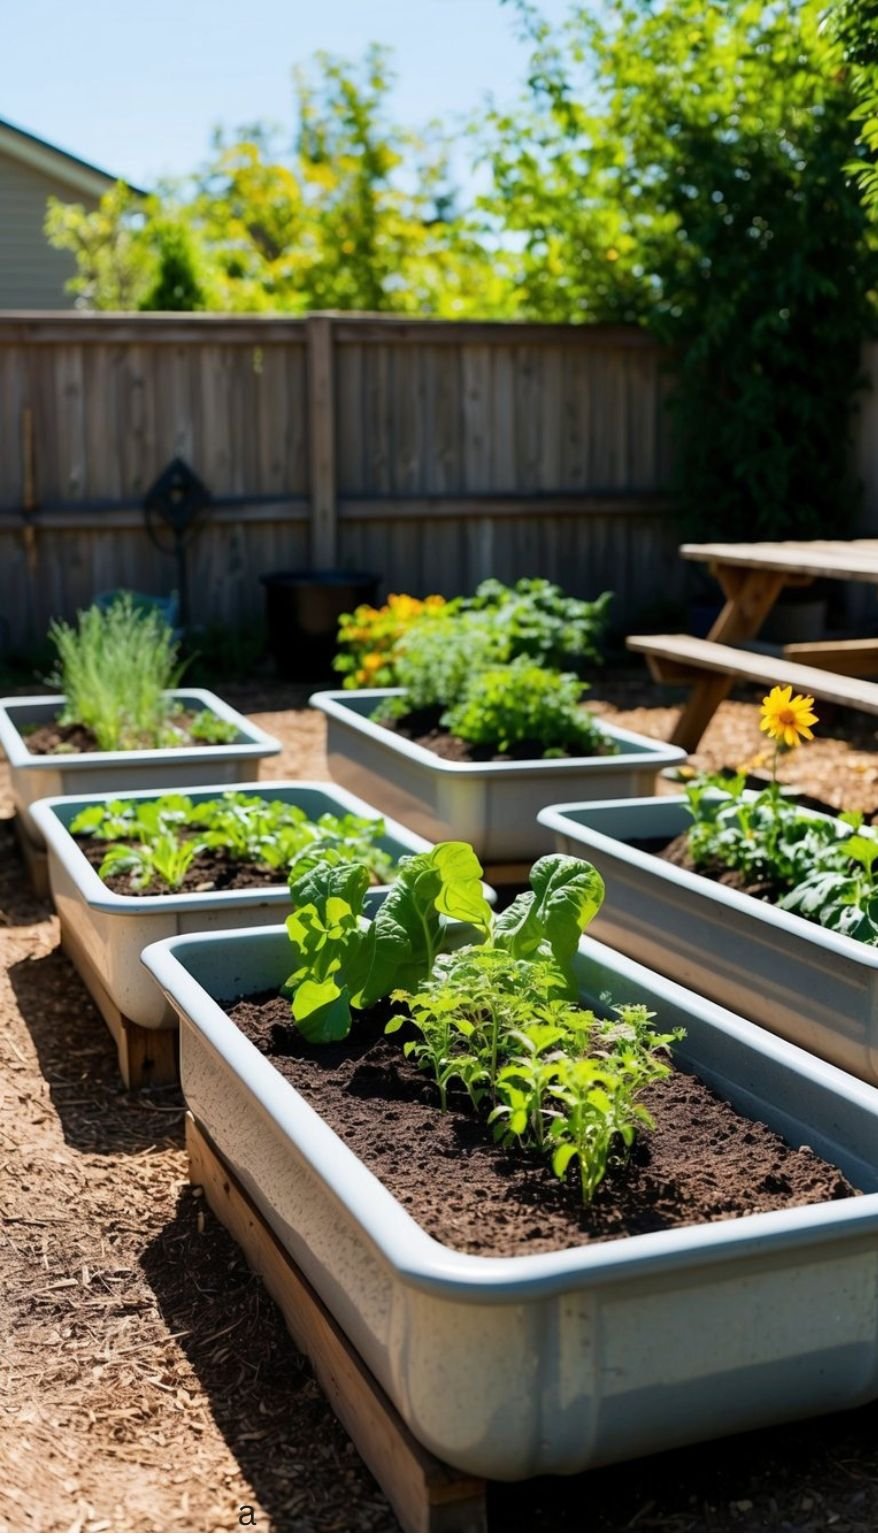
Using farm water troughs as raised garden beds is an excellent choice for any gardener. They are strong, durable, and provide plenty of depth for plants.
I appreciate how these troughs can hold a lot of soil, which helps with root growth. Each trough is typically 2 feet wide and 6 feet long. With a height of 24 inches, they create a perfect environment for growing vegetables and herbs.
When setting up your troughs, ensure they are placed in a sunny location. Sunlight is crucial for plant growth. Some popular plants to grow in troughs include tomatoes, peppers, and herbs like basil and parsley.
Here’s a quick checklist for planting in water troughs:
- Drainage: Make sure the bottom has good drainage. You can drill holes if needed.
- Soil: Use a mix of garden soil and compost for the best results.
- Watering: Check soil moisture regularly, as raised beds can dry out faster.
If you want to add a touch of style, you can paint the troughs or add wooden accents. They not only serve a purpose but can also enhance the look of your garden.
Using water troughs is a fun and practical way to raise your plants. It makes gardening easier and more organized, giving you a neat and lovely garden space. For more tips on this style, check out Steal This Look: Water Troughs as Raised Garden Beds.
12. Raised Garden Bed Uses Scrap Lumber
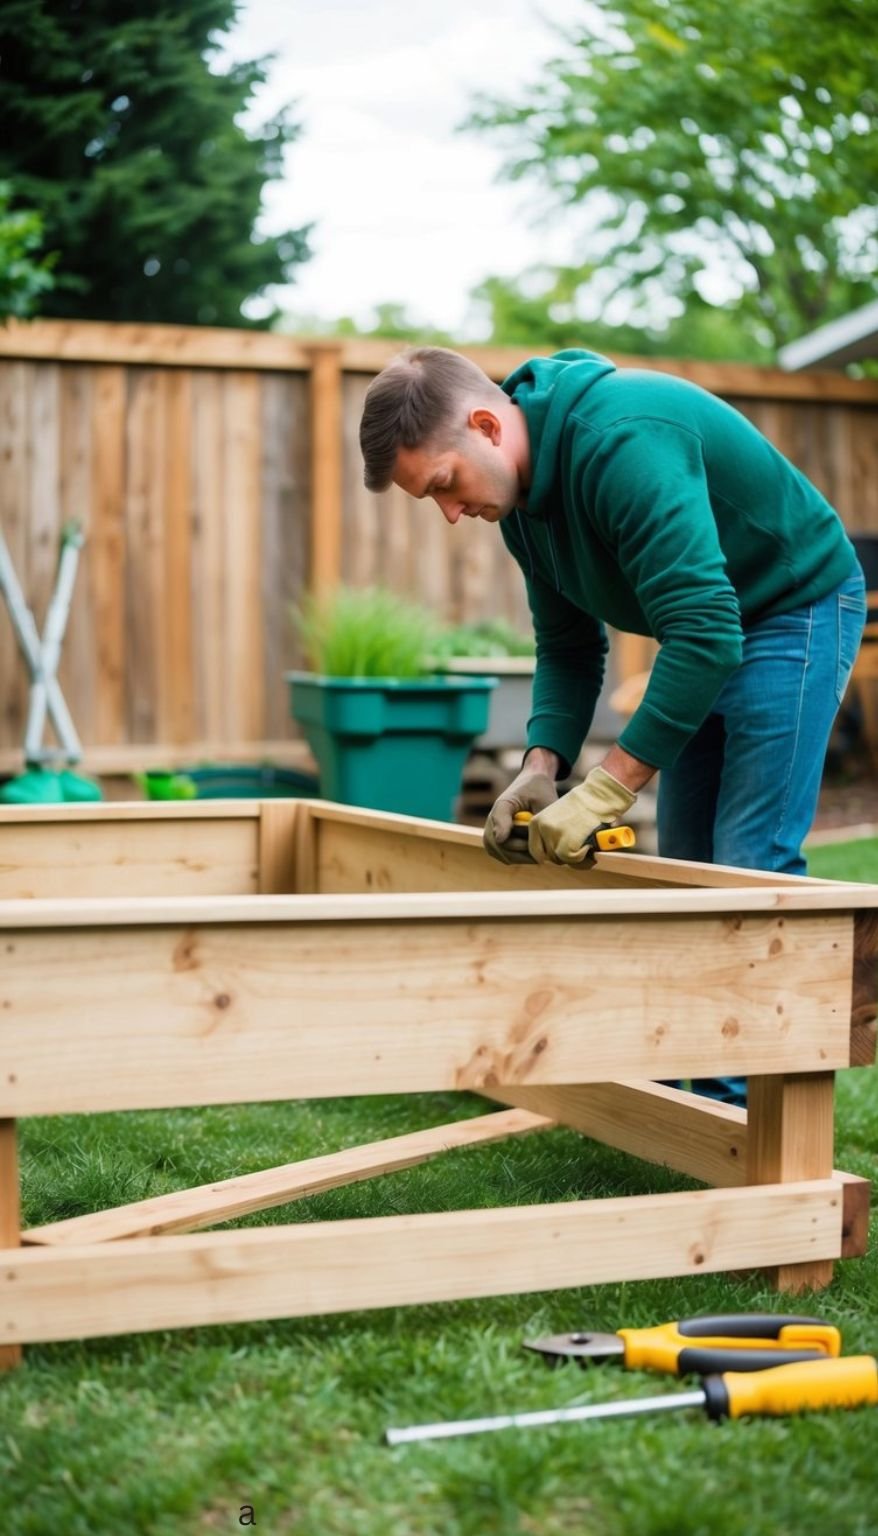
Building raised garden beds with scrap lumber is a great way to recycle materials while creating a productive garden space. I often find that old wood from pallets or decks can be perfect for this.
Here’s how I usually do it:
- Gather Your Scrap Lumber: Look for untreated wood pieces like old fence boards, deck planks, or pallets. Avoid pressure-treated wood since it can contain harmful chemicals.
- Cut to Size: I measure and cut my pieces to create the desired shape. Typically, I make rectangular beds that are about 4 feet by 8 feet.
- Assemble the Frame: Using a drill or screws, I assemble the wood into a frame. It’s best to build a bed about 12 to 24 inches high. This height provides good drainage and makes it easy to work in the bed.
- Layering: I like to line the bottom with cardboard. This helps smother weeds and keep the soil healthy.
- Fill with Soil: Finally, I fill my beds with a mix of good-quality soil and compost. This mix nourishes the plants well.
Using scrap lumber not only saves money but also helps reduce waste. It’s satisfying to create something useful from materials I already have!
13. Raised Garden Bed Using Wooden Planks
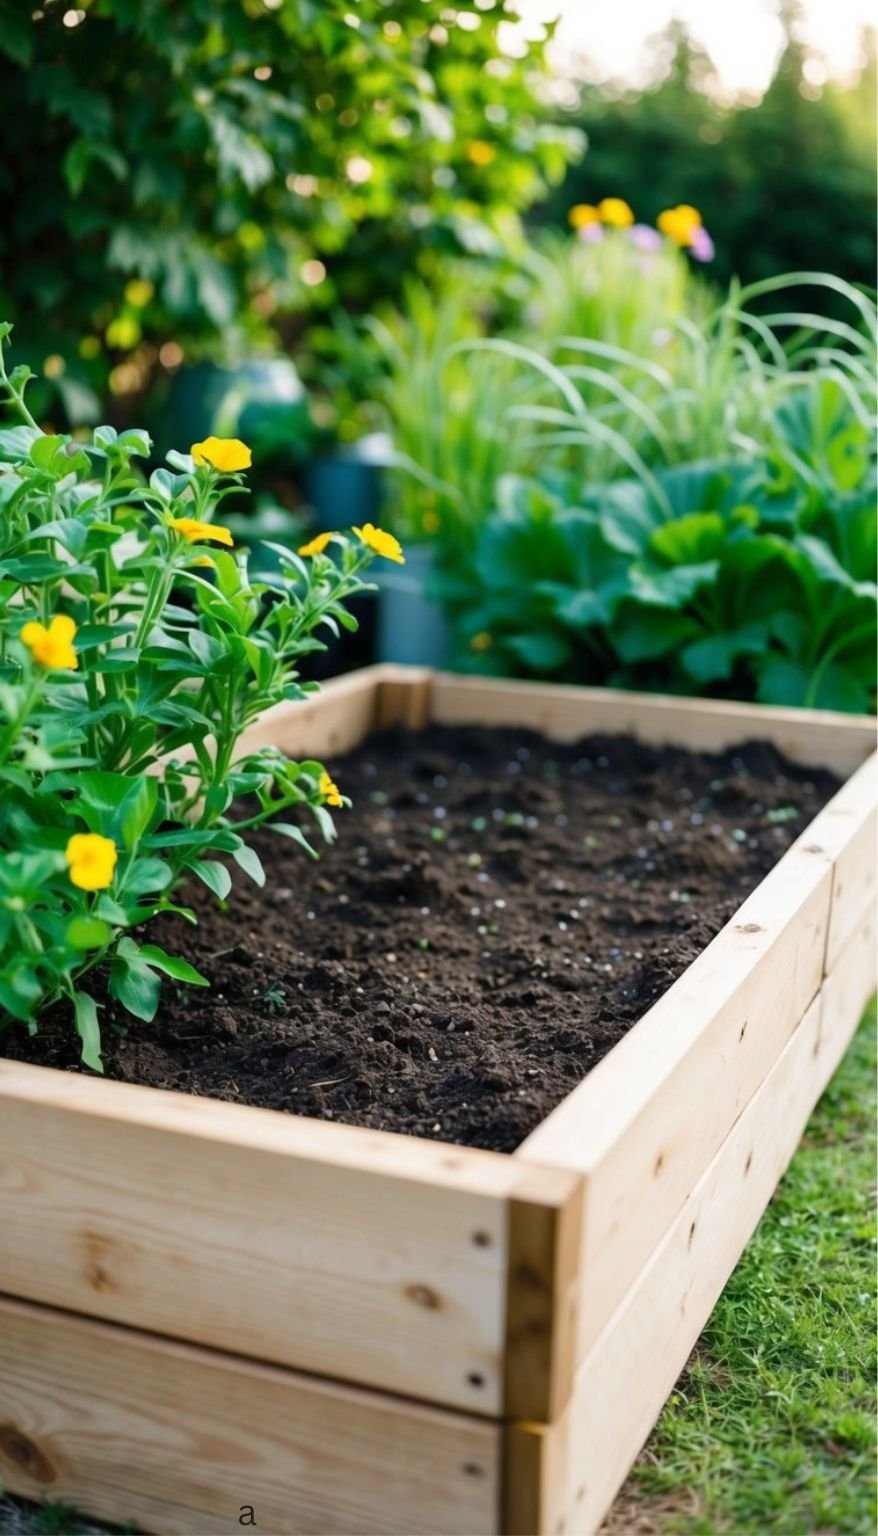
Building a raised garden bed with wooden planks is one of my favorite DIY projects. It’s simple, affordable, and offers a great way to reuse materials.
First, gather your materials. You will need:
- Wooden planks (2×6 or 2×4 work well)
- Screws or nails
- A drill or hammer
- Wood stain or sealant (optional)
I usually start by deciding on the size. A common size is 4 feet by 8 feet, but you can make it any dimension that fits your space.
Next, I cut the planks to my desired lengths. For a rectangular bed, I typically cut four pieces: two for the long sides and two for the short sides.
To assemble the frame, I connect the planks using screws or nails. Make sure to check that the corners are square for stability.
Once the frame is complete, place it in your chosen location. Leveling the ground helps ensure it sits flat.
Adding a layer of cardboard or landscaping fabric at the bottom can help prevent weeds. After that, fill the bed with a mixture of soil and compost for healthy plants to thrive.
Don’t forget to finish the wood with a sealant if you want extra protection from the elements. This will help your garden bed last longer.
Using wooden planks allows me to create a beautiful and functional garden space with minimal cost.
14. Build Raised Garden Beds By Weaving Willow Baskets
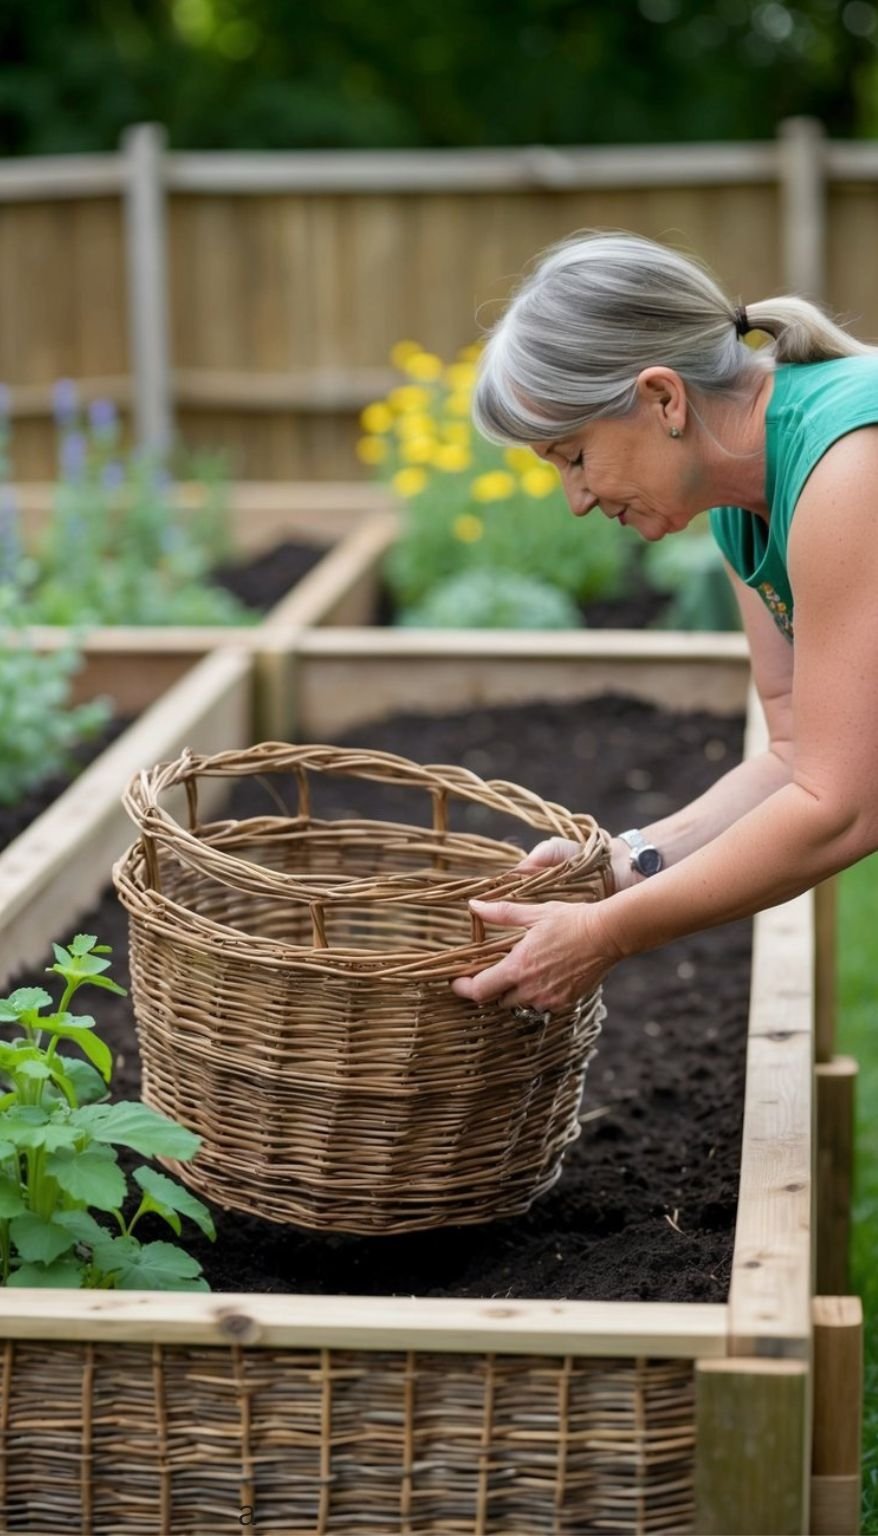
Building raised garden beds with willow baskets is both creative and practical. I find this method charming, as it blends nature with gardening. Here’s how to get started.
Materials Needed:
- Willow branches
- Garden stakes
- Landscape fabric
- Soil
Steps to Create Your Bed:
- Prepare the Area: Choose a sunny spot in your garden where you want the raised bed.
- Set Stakes: Pound garden stakes into the ground at one-foot intervals to outline the shape of the bed.
- Weave the Willow: Gather flexible willow branches and weave them through the stakes, forming a wall. This adds a beautiful natural look to your garden.
- Secure the Structure: Once the desired height is reached, push down the branches to ensure a stable wall.
- Line the Interior: Use landscaping fabric to line the inside of the basket. This helps keep the soil from spilling out.
Filling the Bed: After the structure is in place, fill the bed with rich, organic soil. Adding compost is a great way to nourish your plants.
Willow weaving allows me to create an eco-friendly garden bed that looks good and is functional. Plus, it offers excellent drainage for my plants. This method is an enjoyable project and adds character to my gardening space.
15. How To Make A Garden Planter From A Plastic Kiddie Pool
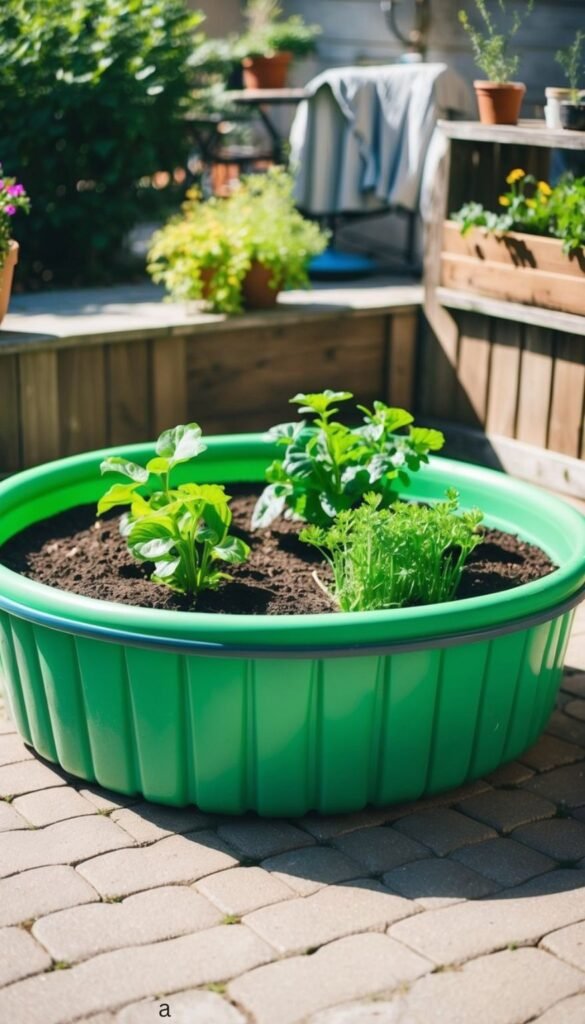
Turning a plastic kiddie pool into a garden planter is a fun and budget-friendly project. I’ve done this myself and loved the results!
Materials Needed:
- Plastic kiddie pool
- Potting soil
- Plants or seeds
- Drill with a 1/2-inch bit
- Rocks (optional)
First, choose a spot in your yard or on your patio where the kiddie pool will get enough sunlight. Make sure that your plants receive plenty of light.
Next, take the drill and create drainage holes. I drill holes about 1/2 inch up from the bottom and space them around the pool, roughly 12 inches apart. This helps prevent water from pooling at the bottom.
Once the holes are ready, fill the bottom with a layer of small rocks. This step is optional but helps with drainage. Then, fill the pool with potting soil, leaving a few inches from the top.
Now it’s time to plant! You can choose your favorite flowers, herbs, or veggies. I like to mix low-growing plants with taller ones for variety.
After planting, water everything well but avoid over-saturating. Check the moisture levels regularly, and enjoy watching your new garden thrive in its colorful kiddie pool!
This project is not only fun but also a great way to recycle. You’ll be amazed at how much joy a simple kiddie pool can bring to your gardening experience.
![How To Fill Raised Garden Beds - [With Simple 5 Layer!] 20 How To Fill Raised Garden Beds - [With Simple 5 Layer!]](https://homesteadask.com/wp-content/uploads/2024/09/How-To-Fill-Raised-Garden-Beds-With-Simple-5-Layer-768x614.jpg)
![12+ Lawn Edging Ideas on a Slope - [Keep Grass in Check] 22 12+ Lawn Edging Ideas on a Slope - [Keep Grass in Check]](https://homesteadask.com/wp-content/uploads/2024/09/12-Lawn-Edging-Ideas-on-a-Slope-Keep-Grass-in-Check-768x614.jpg)
![How to Build a Simple Raised Garden Box [Easy DIY!] 23 15+ Recycled Garden Edging Ideas to Enhance Your Outdoor Space [Visual Guide]](https://homesteadask.com/wp-content/uploads/2024/09/15-Recycled-Garden-Edging-Ideas-to-Enhance-Your-Outdoor-Space-Visual-Guide-2-768x614.jpg)